Generating and setting up basic engine sounds | [Part 12] Low poly vehicle for UE4
by Arthur Ontuzhan
Posted 5 years, 6 months ago Last edit 2 years, 3 months ago
Introduction
This is the twelfth part of the tutorial series on how to create a low poly vehicle for Unreal Engine 4 using Blender and other free software. You can see the outcome of the tutorial series or get project files here.
In this tutorial, we will generate basic engine sounds for vehicles using LMMS and Audacity and then set them up in UE4.
You can find other parts here:
- [Part 1] Modeling low poly vehicle base in Blender.
- [Part 2] Modeling low poly vehicle wheels.
- [Part 3] Texturing the vehicle model.
- [Part 4] Making speedometer and tachometer textures.
- [Part 5] Rigging vehicle the vehicle model.
- [Part 6] Setting up basic vehicle in Unreal Engine 4.
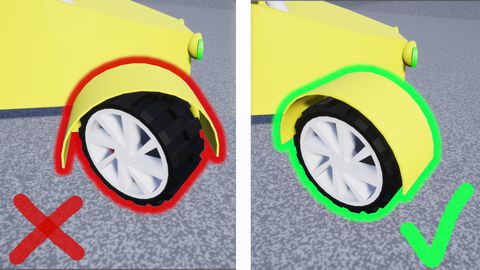
- [Part 7] Making mudguards and brake calipers move together with wheels.
- [Part 8] Making openable doors and animated steering wheel.
- [Part 9] Adding lights and brake lights.
- [Part 10] Adding speedometer and tachometer and first person camera.
- [Part 11] Adding turn signals with automatic turn off.
Also, there's a video if you have difficulties to understand some parts.
Generating vehicle sounds in LMMS
I will be using LMMS 1.2.2, but newer versions also should work.
The first step is to download LMMS, install it, and then open it and we should see a new empty project.
By default, we should see that an empty project has 3 windows open in it: Song-Editor, FX-Mixer, and Controller Rack. We will use Song-Editor and FX-Mixer windows, you can close the Controller Rack window, so it wouldn't bother you.
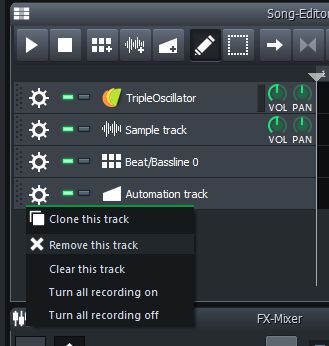
We see, that in the Song-Editor window we already have 4 tracks with different instruments and beat/bassline tracks. We will use only the TripleOscillator instrument, so we can remove all other tracks.
- Remove all tracks except the TripleOscilator track by clicking on the gear icon next to the track and then click on Remove this track.
Now we need to make our TripleOscilator to make some sound. Let's make it play one note for some time. At first, we need to add a segment to the track and then in the segment, we will need to add a note.
- With the left mouse click on the TripleOscilator track's first segment.
- Double click the newly created segment, after this you should see the Piano-Roll window pop up.
- In the Piano-Roll window using the mouse wheel scroll down to the C2 octave.
- Make a C note in the C2 octave.
- Resize note so it would be a whole note/last for 4 beats. You can change the note's length by clicking and dragging at the end of the note bar.
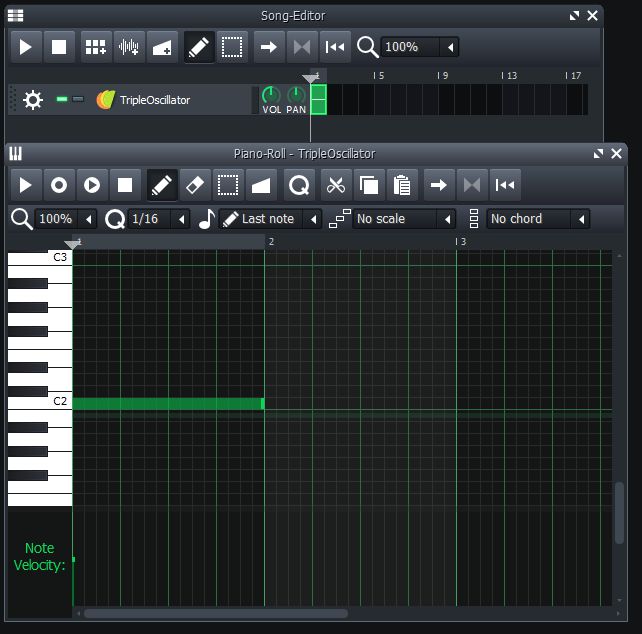
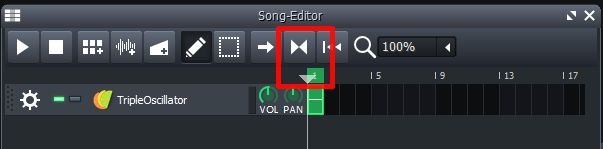
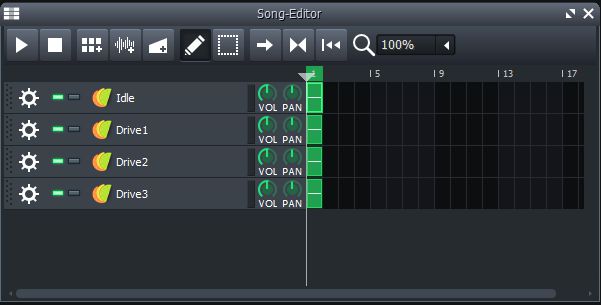
If you did all steps correctly, your piano roll and song editor windows should look like in the image above. If you would click the play button in the piano-roll window, you should hear a deep hollow looping sound. But if you will click play in the Song-Editor, the sound will not loop. Because we will not work with the piano-roll window anymore, let's enable looping in the song-editor playback.
- In the song editor window, click on the button that has 2 triangles facing each other until the button looks enabled and bare above tracks becomes green.
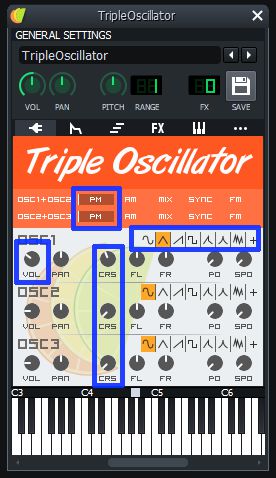
We have looping sound that doesn't sound much like an engine. Let's make it sound more similar to the vehicle engine by changing some settings for TripleOscillator.
- In the tracks click on the TripleOscilator label and its settings window should pop up.
- In the OSC1+OSC2 select PM value.
- In the OSC2+OSC3 select PM value.
- For OSC1 set volume to 60. You can set it by double-clicking the volume knob or just mouse down over the volume knob and drag the mouse around to change the value.
- Change OSC1 CRS value to -4.
- Change OSC1 to use triangle wave.
- Change OSC2 CRS value to -24.
- Change OSC3 CRS value to -24.
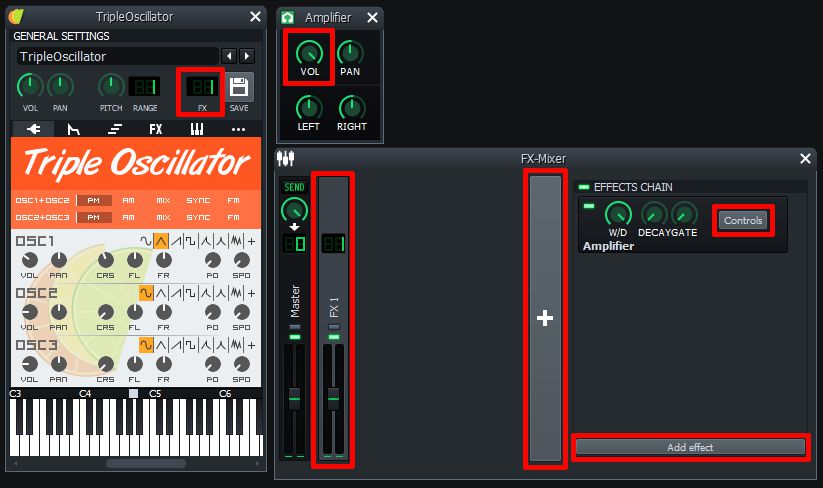
Now we got a sound that sounds somewhat like an idle engine. Let's amplify this sound by adding an amplifier effect to it.
- In the FX-Mixer window, click on the big plus sign button.
- Click on the newly created channel. It has an FX 1 label on it.
- Click on the Add Effect button.
- In the window select Amplifier that's LMMS type and click OK.
- Click on the Controls button in the Amplifier section.
- In the Amplifier controls turn the Volume value to the maximum value.
- In the TripleOscilator settings hover the mouse over the FX number, hold the mouse down, and then drag until the number changes to 1.
Now we have one sound ready for an idle engine. We need to make 3 more sounds for different engine loads. For that we can use the same TripleOscilator setup, but with little different settings. To do that quickly, we will just duplicate our current TripleOscilator track a few times and change settings in duplicated tracks.
- In the Song-Editor window click on the TripleOscilator track's gear icon and click Clone this track. Do that until you will have 4 total TripleOscilator tracks. Also rename your tracks so it would be easier to recognize them.
Now we need to change CRS values for each track.
- For Drive1 change OSC1 CRS to 0, OSC2 CRS to -20, OSC3 CRS to -20.
- For Drive2 change OSC1 CRS to 2, OSC2 CRS to -18, OSC3 CRS to -18.
- For Drive3 change OSC1 CRS to 2, OSC2 CRS to -16, OSC3 CRS to -16.

You might have a question, why do I choose those CRS values? I just experimented, and those values felt best for me. Experiment with them if you will want to change the end result.
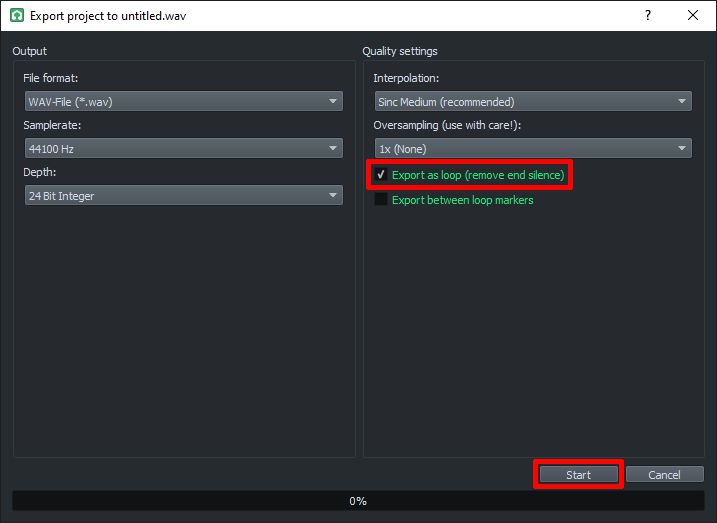
Now we can export those sounds.
- In the Song-Editor window set solo one of the tracks. Click on the second small button on the right side from the gear icon to make the track solo. You will see the track highlighted and hear that only this track will be played.
- Go to File -> Export...-> Set file name and choose where to save it and click Save.
- In the export settings check Export as loop (remove end silence).
- Click Start.
- Repeat steps for each track.
Making sounds loopable in Audacity
If we would import our previously generated sounds straight into UE4, then we would hear that they aren't perfect loops. You would hear click like sound when the sound would make a loop. To make those sounds loopable, we need to cut a small portion of its end, so it would make a perfect loop. We will do that by using Audacity.
The first step is to download Audacity, install it, and then open it and we should see a new empty project.
- Then take one of the previously generated sound files and drag it in the audacity window. Or you can File -> Import -> Select the sound and click Open.
Now if we would Loop Play (press Shift+Space or hold Shift and click the play button) this sound, we would hear the click at the end of each loop from what we want to get rid of. To fix that, we need to make the sound's end part seamlessly blend with its start part.
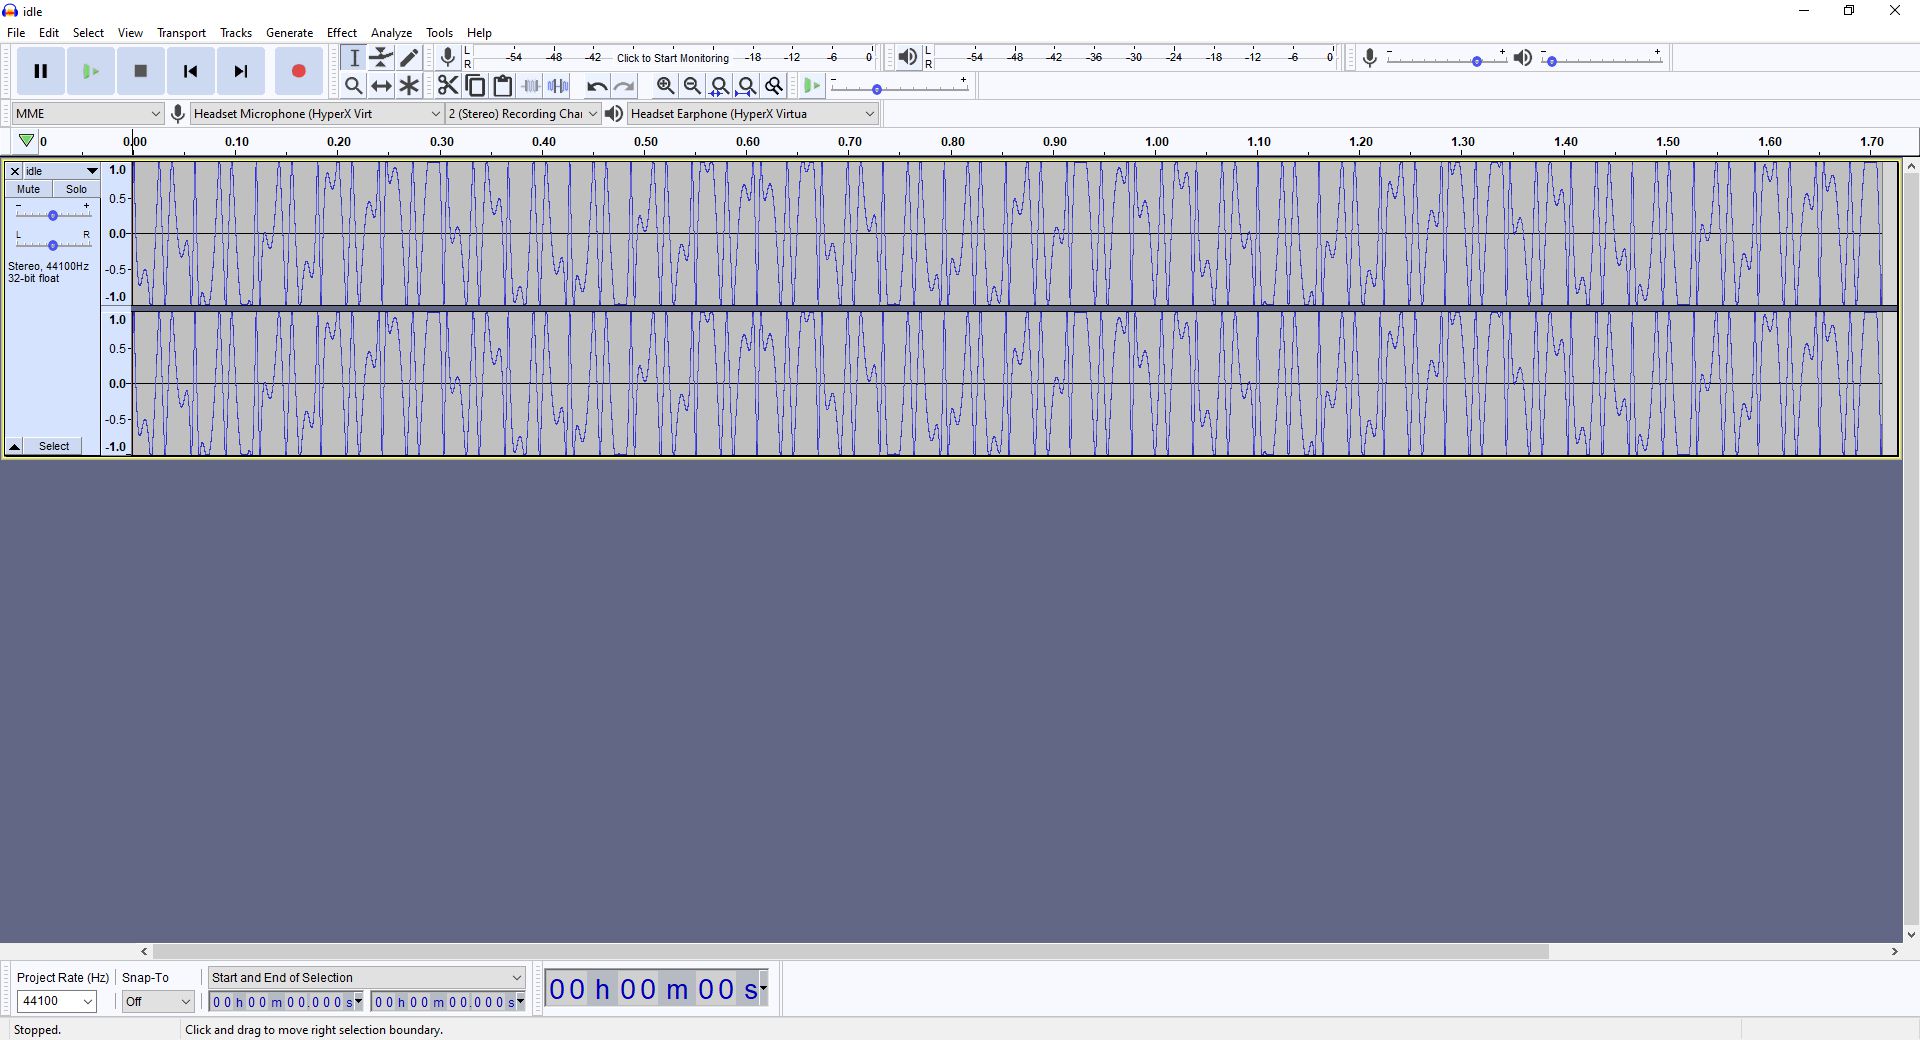
Let's inspect our audio file's waveform, so we could understand what we need to do to make a sound like a perfect loop.
- Zoom in on the audio's waveform by holding Ctrl and scrolling the mouse wheel or by pressing Ctrl+1 several times.
- Look at how the waveform looks at the beginning and ending.
We can see that the audio's waveform starts around the middle line of the track, and it ends way below the track's middle line. That's the reason we hear a click at the end of the loop because there's a jump in the waveform.
You might think that we can easily fix that click at the end of the loop, by just cutting the ending of the waveform so it would end at the same place as it starts. This would remove the obvious click at the end, but you could still hear when the loop ends if you would listen carefully to it.
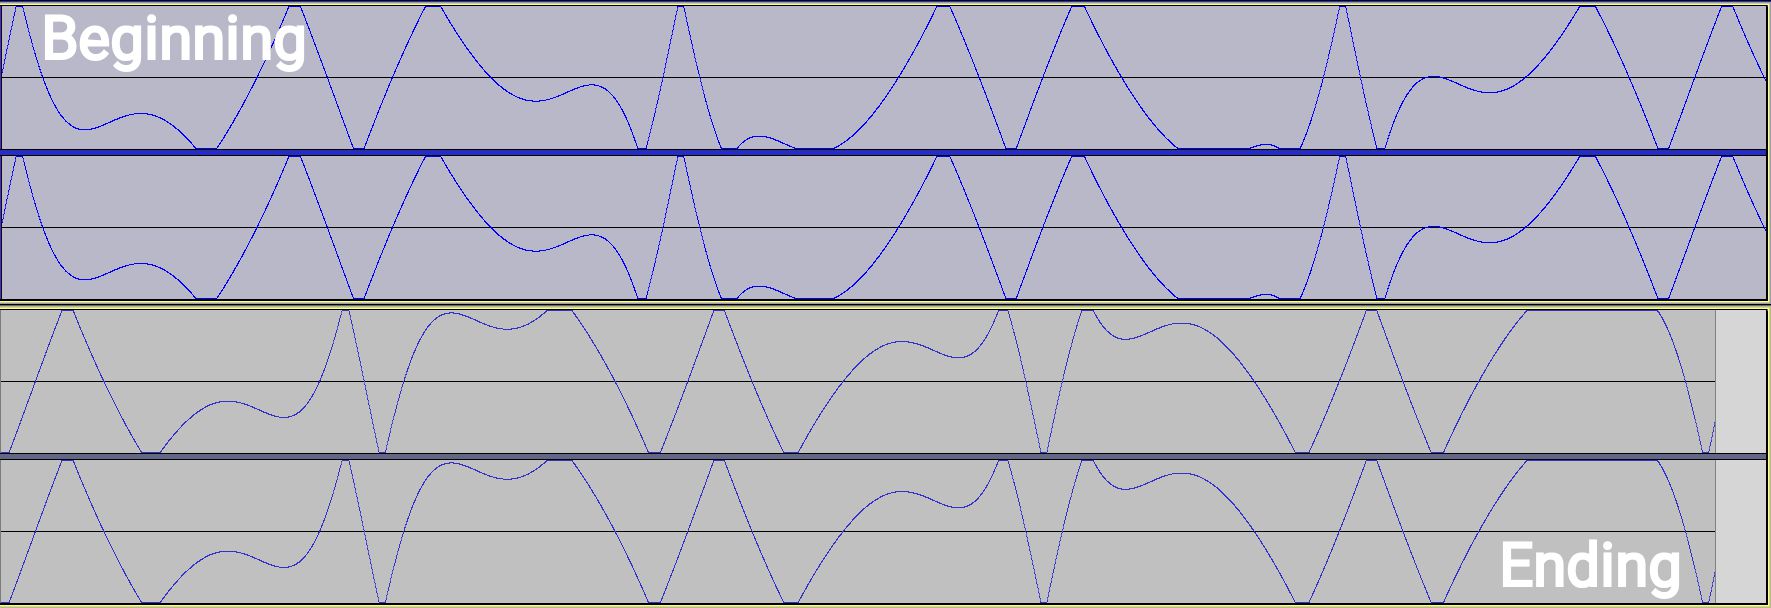
To make the sound loop seamlessly, we need to look at the waveform pattern at the start of the sound, and then just look for a similar pattern at the end of the sound. When we find the pattern, we just cut the audio just before the pattern starts so it would seamlessly loop to the beginning of the sound.
- Look at the waveform pattern at the begging of the sound.
- Find the same pattern at the end part of the sound.
- Select (hold down left mouse click and drag) the end part of the waveform from the point where the pattern starts till the end of the sound.
- Delete the selection by pressing Del.
- Loop Play (press Shift+Space or hold Shift and click the play button) sound and check if it's good. If not, undo and repeat or just zoom in more and delete a bit more from the ending.

If you look at the image above and the beginning of the sound waveform in the previous image, then you will see that selection looks the same as the start of the sound. That's why we are getting a seamless loop.
Now we can export it by pressing File -> Export -> Export as WAV -> Set location -> Click OK in the Edit Metadata Tags window.
Repeat the same process for each sound.
Setting up vehicle engine sounds in UE4
At first, we need to import sounds in our UE4 project.
- Open Sounds folder.
- Import all 4 sounds.
Creating Sound Cue asset
Now we need to create a Sound Cue asset that will use all our sounds to make one sound that we could easily use for our vehicle blueprint.
- Right mouse click in the Songs folder.
- Go to the Songs section and select Sound Cue. Rename it to EngineCue.
- Double click on the asset to open it.
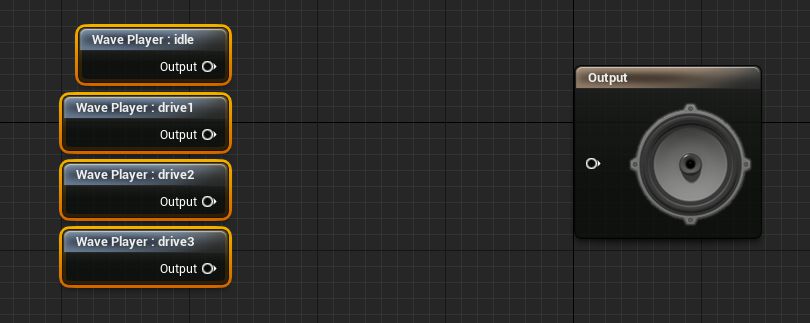
We will see that in the sound cue asset we only have one Output node. We need to add our sounds into it, so we could do something with them.
- Select sound assets from the content browser, and then just drag and drop them into the sound cue asset's window. Align nodes like in the image below, so it would be easier to use them further.
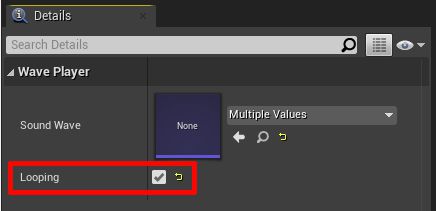
Right now our sound nodes aren't looping. We need to set them as looping.
- Select all sound nodes and in the details panel check Looping.
- Now for each sound node, we need to connect a Continuous Modulator node. This node will allow us to manipulate the pitch and volume of each sound based on the value of a parameter that we will provide from the vehicle blueprint.

We need also to change some parameters for these nodes.
For each Continuous Modulator node change Pitch Modulation Params into their details panel to the following ones:
- Idle
- Parameter Name: RPM
- Default: 1.0
- Min Input: 0
- Max Input: 200
- Min Output: 0.65
- Max Output: 1.1
- Param Mode: Absolute
- drive1
- Parameter Name: RPM
- Default: 1.0
- Min Input: 20
- Max Input: 600
- Min Output: 0.8
- Max Output: 1.0
- Param Mode: Absolute
- drive2
- Parameter Name: RPM
- Default: 1.0
- Min Input: 500
- Max Input: 2800
- Min Output: 0.7
- Max Output: 1.25
- Param Mode: Absolute
- drive3
- Parameter Name: RPM
- Default: 1.0
- Min Input: 2200
- Max Input: 5700
- Min Output: 0.96
- Max Output: 1.9
- Param Mode: Absolute

We now have 4 node outputs, but the Sound Cue output has only one input. We need to merge all these node outputs into one input, and we will do that by using Crossfade by Param node.
- Add a Crossfade by Param node to the sound cue.
- Add 2 more inputs to it and connect all Continuous Modulator nodes to it.
- Connect Crossfade by Param node's output to the sound cue output's input.

As for Continuous Modulator nodes, we also need to change parameters for this node.
In the Crossfade by Param node's details panel, change parameters to the following ones:
- Param Name: RPM
- Cross Fade Input
- 0
- Fade In RPM Value Start: 0.0
- Fade In RPM Value End: 0.0
- Fade Out RPM Value Start: 200.0
- Fade Out RPM Value End: 400.0
- Volume: 1.0
- 1
- Fade In RPM Value Start: 150.0
- Fade In RPM Value End: 350.0
- Fade Out RPM Value Start: 600.0
- Fade Out RPM Value End: 800.0
- Volume: 0.6
- 2
- Fade In RPM Value Start: 550.0
- Fade In RPM Value End: 750.0
- Fade Out RPM Value Start: 2300.0
- Fade Out RPM Value End: 2350.0
- Volume: 0.6
- 3
- Fade In RPM Value Start: 2290.0
- Fade In RPM Value End: 2340.0
- Fade Out RPM Value Start: 5800.0
- Fade Out RPM Value End: 5800.0
- Volume: 0.6
- 0

From where I got all those values? I just experimented with them until I got to this point. Try to experiment with the values by yourself so you could find the sound that will best suit your needs.
If we would use this sound cue, then we would hear vehicles sound even if we wouldn't be near to the vehicle, and we couldn't determine from what side sound comes from. That's why we need to set Attenuation settings for Sound Cue.
- Right mouse click in the Songs folder.
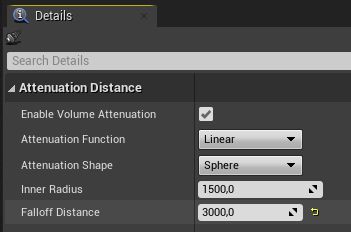
- Go to the Songs section and select Sound Attenuation. Rename it to SoundAttenuation.
- Double click on the asset to open it.
- Change the Inner Radius value to 1500.
- Change the Falloff Distance value to 3000.
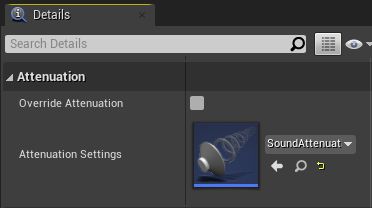
Now we need to set it in our Sound Cue settings.
- Open Sound Cue asset.
- Click on the Output node.
- In the Details panel scroll down to the Attenuation section and as Attenuation Settings value set previously made Sound Attenuation asset.
Setting up Sound Cue in vehicle blueprint
Now our Sound Cue is ready and we can set it up in the vehicle's blueprint.
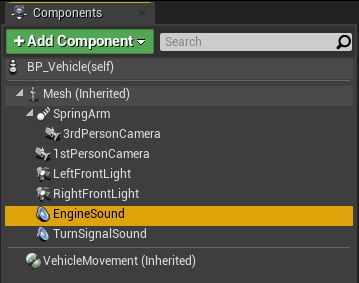
- Open Vehicle's Blueprint.
- Under the Mesh component, add an Audio component as a child.
- Rename it to EngineSound. Also optional step.
- In the Audio component details set its location to X 90 Y 0 Z 10. Set it to where you want your engine sound come from.
- For the EngineSound component in its details panel set its sound to our previously made sound cue asset.

- In the Event Graph at the end of the Event Tick add blueprints that will Set Float Parameter for the Engine Sound component based on the vehicle's RPM. Look at the image below.

And that's it. Now our vehicle has a basic engine sound set up.
In the previous tutorial, I forgot to set up Sound Attenuation for the turn signals. In the Vehicle Blueprint select the TurnSignalSound component and in the details panel set Attenuation Settings to SoundAttenuation asset we made in this tutorial.
Share on
Related Creations
Related Articles
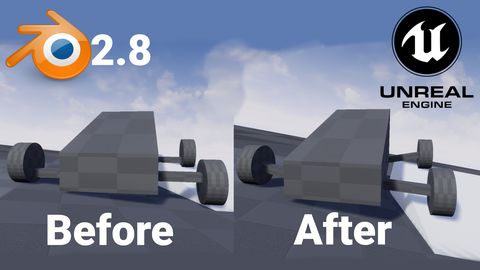
How to get simple suspension animation for vehicle in UE4 with Blender 2.8
Tutorials Blender Unreal Engine
Rigging the vehicle model in Blender | [Part 5] Low poly vehicle for UE4
Tutorials Blender Unreal Engine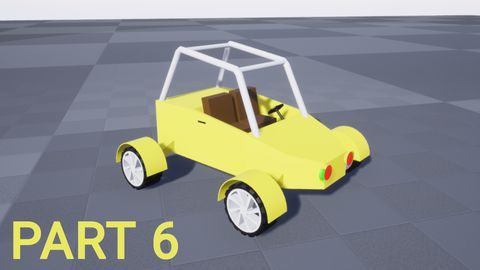
Setting up basic vehicle in Unreal Engine 4 | [Part 6] Low poly vehicle for UE4
Tutorials Unreal Engine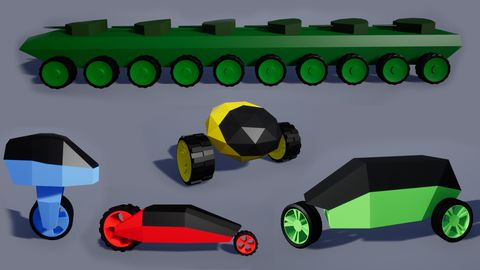
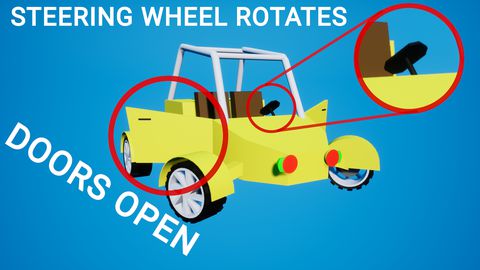
Making openable doors and animated steering wheel | [Part 8] Low poly vehicle for UE4
Tutorials Unreal Engine
Adding speedometer and tachometer and 1st person camera | [Part 10] Low poly vehicle for UE4
Tutorials Unreal Engine