How to use Simple Wheeled Vehicle Movement Component in UE4
by Arthur Ontuzhan
Posted 6 years ago Last edit 5 years, 11 months ago
Categories: Tutorials Unreal Engine Tags: Vehicle UE4
Introduction
If you have ever tried to set up a vehicle in Unreal Engine 4 with more or less than 4 wheels using default Wheeled Vehicle pawn, then you might have realized that it only supports 4 wheeled vehicles.
You can use custom made Unreal Engine vehicle pawns that support different amounts of wheels, but they aren't free. Also, there's another solution, by faking wheel physics, by copying other wheel animations in animation blueprint, but then it doesn't look physically accurate.
If you need a simple vehicle, then you can use Simple Wheeled Vehicle Movement Component which provides basic functionality for vehicle creation.
Simple Wheeled Vehicle Movement Component works up to 20 wheels. If you use more, it crashes the editor.
Also, there's a video if you have difficulties to understand some parts.
You can get this tutorial project files and vehicle mesh files from gumroad or itch.io
Prerequisites
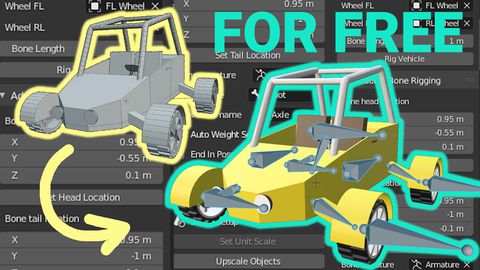
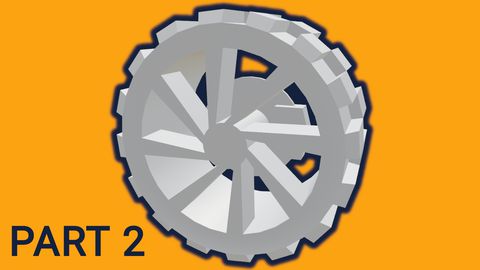
- You need to have some correctly rigged vehicle models. You can rig them by using Blender with this addon. Or just get models from here
- Basic Unreal Engine 4 knowledge.
- I assume that you know how to set up 4 wheeled vehicle using default UE4 Wheeled Vehicle pawn. If you don't know how, you can check this tutorial.
Setting inputs for project
I will use a blank game project for this tutorial, so I need to set up inputs for it. If you will use a different template, I recommend checking, if you have similar inputs set up.
You can find where to set inputs, by opening Project settings, and then in the Input tab, you can set up Action and Axis Mappings. Make sure to change scales to 1 and -1 where needed.

Setting up basic vehicle blueprint
Because we will make multiple vehicles in this project, it's a good thing to make a base blueprint for our vehicles, so we would not copy the same things over and over.
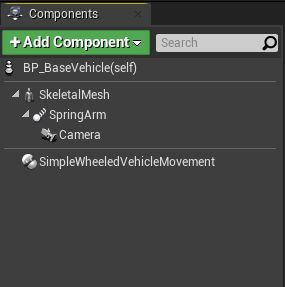
- Make new blueprint with pawn parent class.
- Add a Skeletal Mesh component to the blueprint.
- Under the Skeletal Mesh component add a Spring Arm component as a child.
- Under the Spring Arm component add a Camera component as a child.
- Add a Simple Wheeled Vehicle Movement component to the blueprint.
Let's change skeletal mesh component settings, so it would have physics active for it. Before you set it up, you need to have at least some kind of skeletal mesh imported in the project, because without having selected mesh in skeletal mesh component, you can't change some settings which we need to change.
- Set Skeletal Mesh for the component.
- In the Physics section check Simulate Physics.
- In the Collision section set Collision Preset to Vehicle.

Optionally we can also edit spring arm settings, so our camera would not shake too much, and let's make it longer.
- In Spring Arm details change Target Arm Length to 600.
- In Camera Settings section uncheck Inherit Pitch and Inherit Roll.

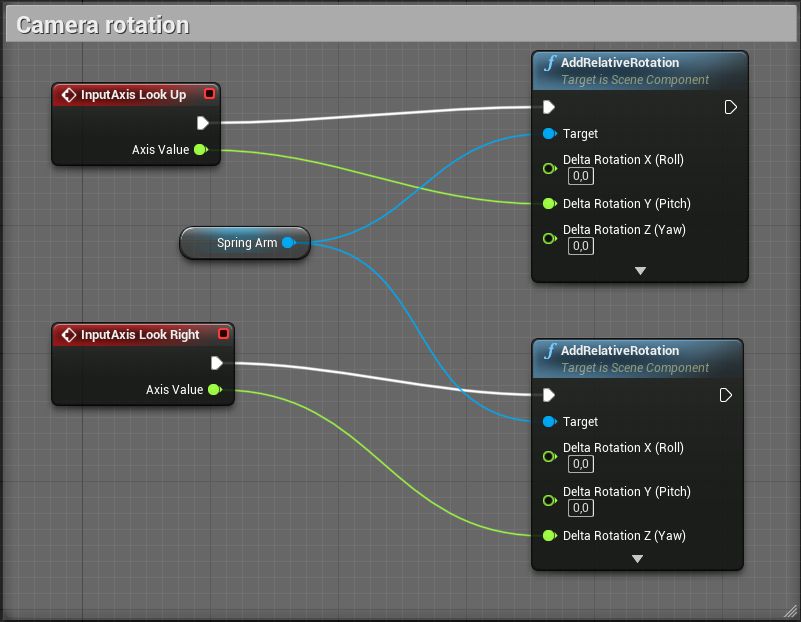
Our all vehicles also will have the camera look around, which we will also implement in this base blueprint
- Open Event Graph.
- Make the blueprints which you see in the image below. On AddRelativeRotation node, you will not have 3 inputs by default, to get them Right click on Delta Rotation variable and press Split Struct Pin, and now you will have 3 inputs.
3 wheel vehicle
Now when we are done with our Base vehicle blueprint, we can create our vehicles. Let's start with the simplest one, 3 wheeled vehicle.
Physics asset
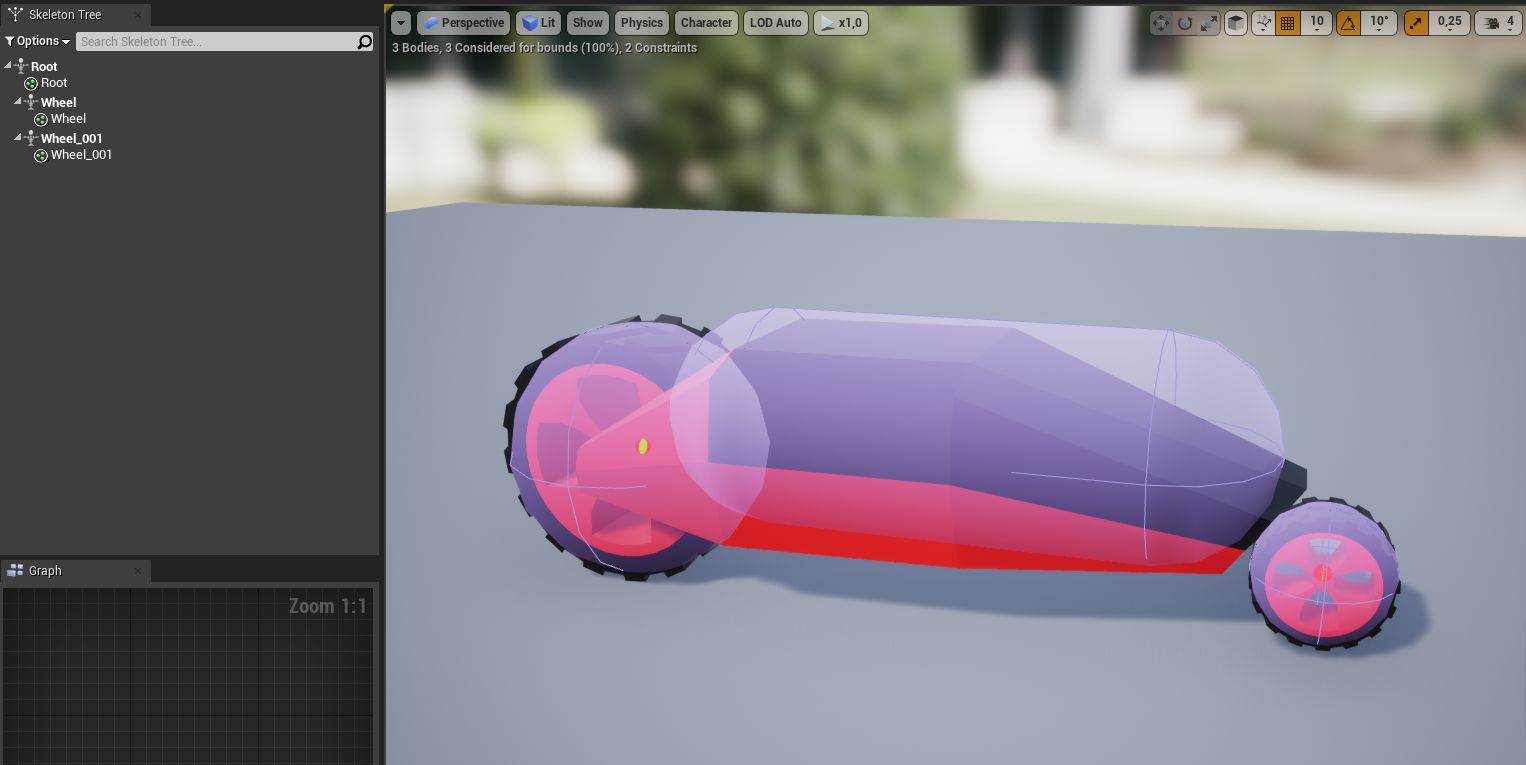
By default model import settings, our vehicle model usually will get not so great physics asset. Usually, wheels get capsule physics bodies, which aren't great for them. So we need to fix our physics bodies for our vehicle.
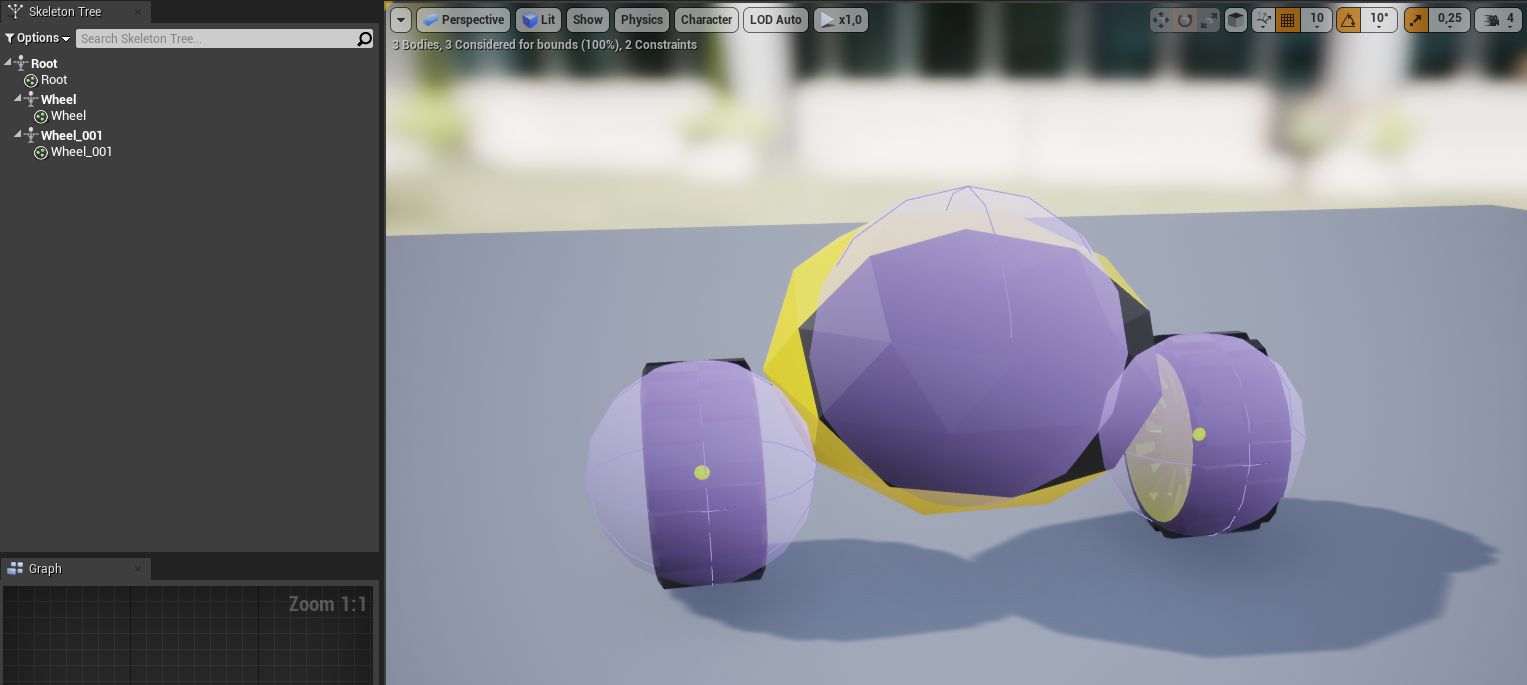
- Open vehicle's physics asset. Select physics bodies, which don't look right, and delete them.
- If you want to regenerate bodies, you might not see your skeleton bones in the skeleton tree. In Skeleton Tree there is an Options menu in which you can enable Show All Bones.
- You can leave your vehicle's wheels without physics bodies, but you need to have at least one physics body for your mesh, otherwise, the vehicle will not work.
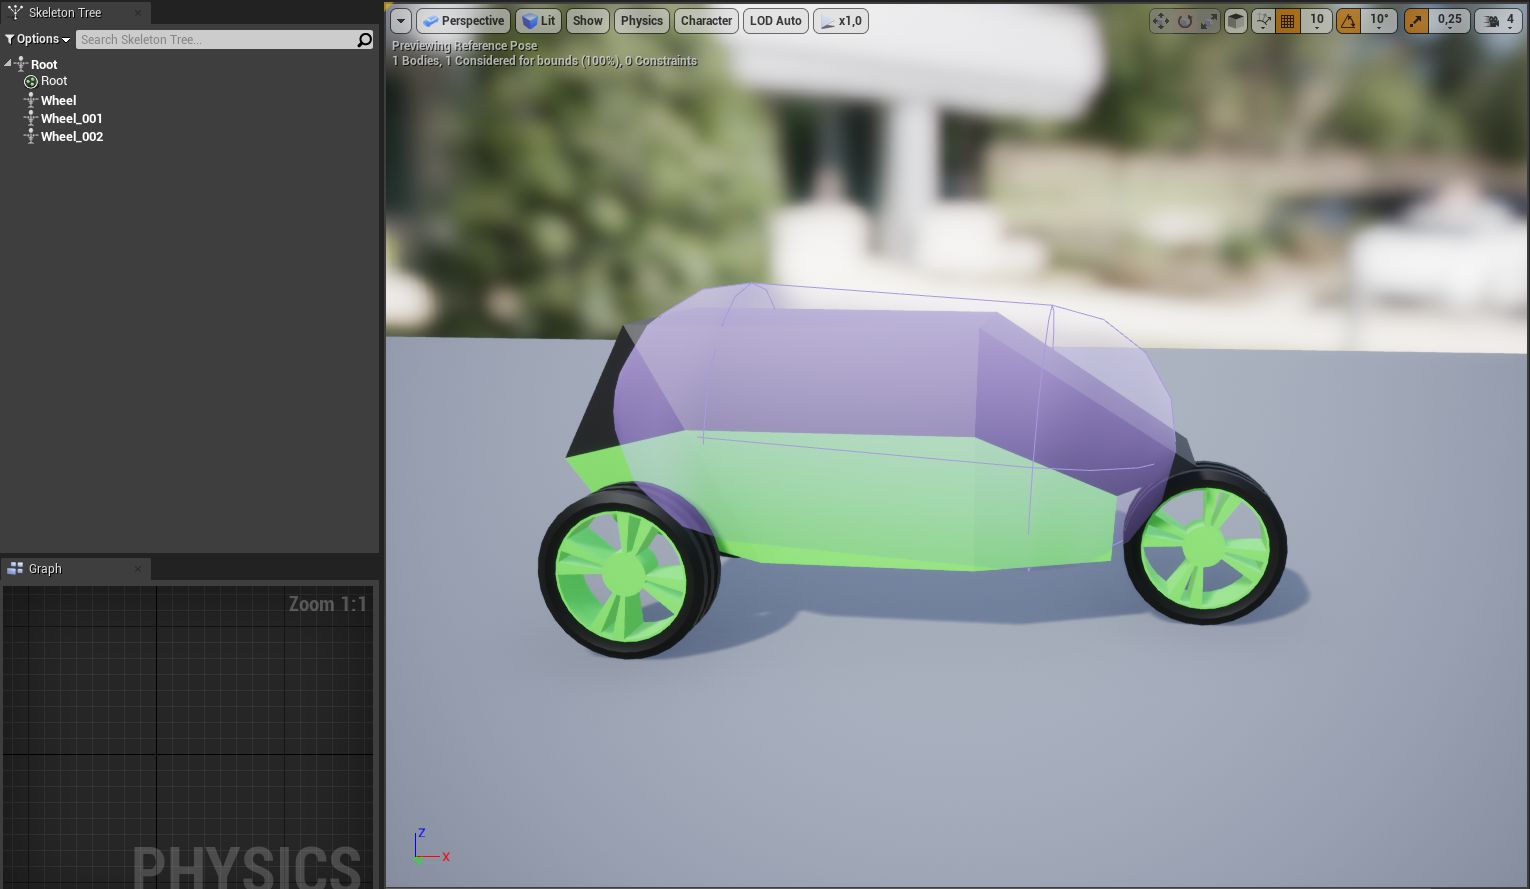
As you can see in the image above, I have only one physics body for the base of my 3 wheel vehicle.
Wheel blueprints
We also need to make wheel blueprints for our wheels. In my case all 3 wheels are the same size, I will need only one wheel blueprint.
- Click Add new button or right mouse click in the content browser.
- Select Blueprint Class.
- Expand All Classes tab at the bottom of the class select window.
- Search for VehicleWheel class and select it.
- Name your blueprint and open it.
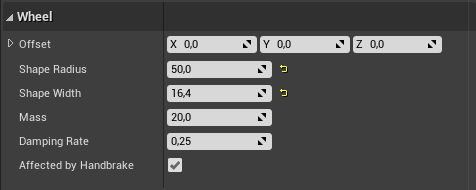
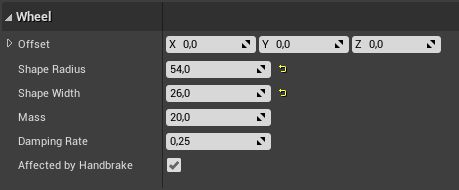
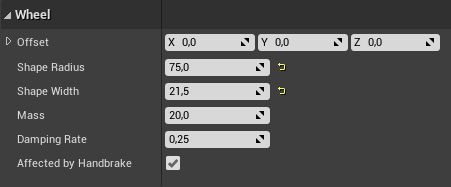
- In Details tab in Wheel section set Shape Radius and Shape Width to your vehicle wheel sizes.
- Shape Radius is exactly what it means. If you know the height of your wheel, just divide it by 2.
- Shape Width is actually half of the actual wheel width.
Animation blueprint
Now we need to set up an animation blueprint for a vehicle.
- Click Add new button or right mouse click in the content browser.
- Under Create Advanced Asset move to Animation and in a sub-menu select Animation Blueprint.
- In Create Animation Blueprint window as Parent Class select VehicleAnimInstance.
- In the same window as Target Skeleton select your vehicle's skeleton.
- Press OK, rename blueprint as you want, and then open it.
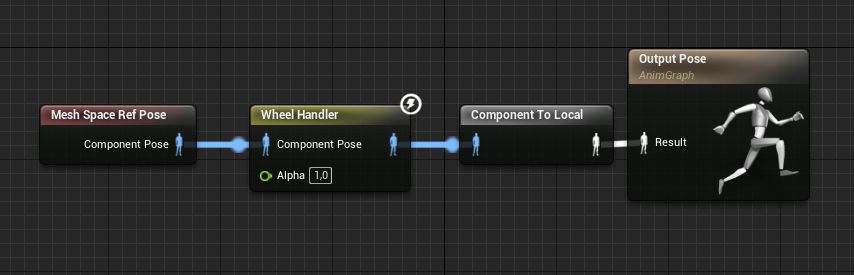
- And then in the Anim Graph make blueprints as in the image below.
Vehicle blueprint
We are ready to create our vehicle blueprint now.
- Click Add new button or right mouse click in the content browser.
- Select Blueprint Class.
- Expand All Classes tab at the bottom of the class select window.
- Search for our Base Vehicle class that we created before and select it.
- Name it and then open it.
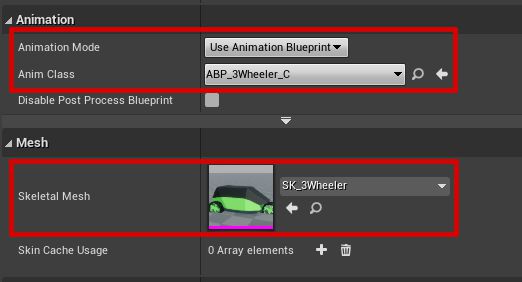
- Set correct mesh for the Skeletal Mesh component and choose the right Animation Blueprint class for it.
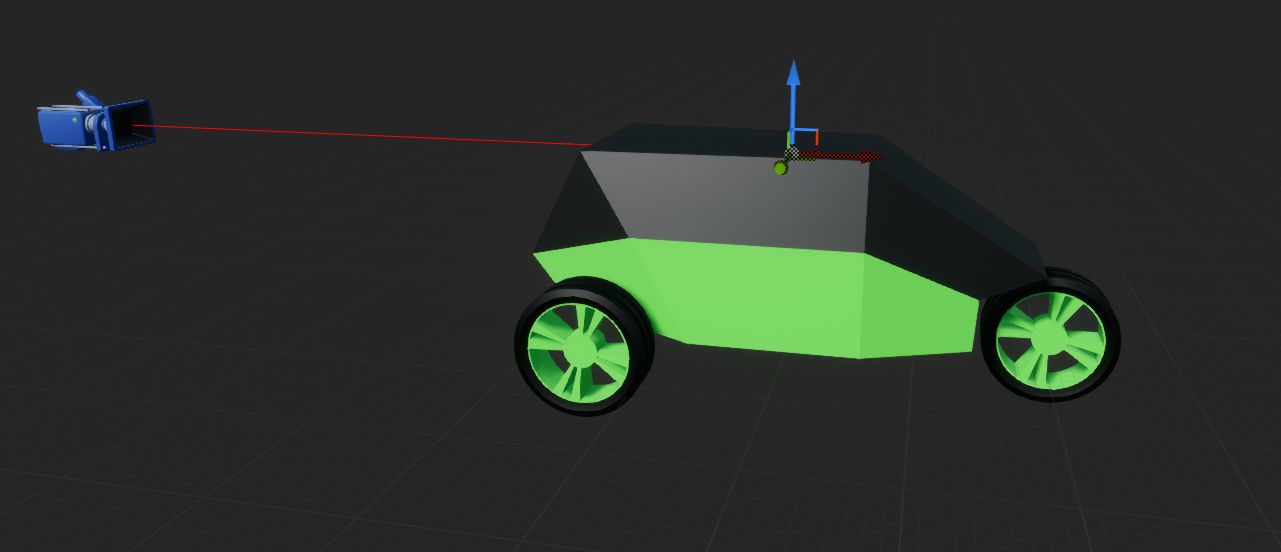
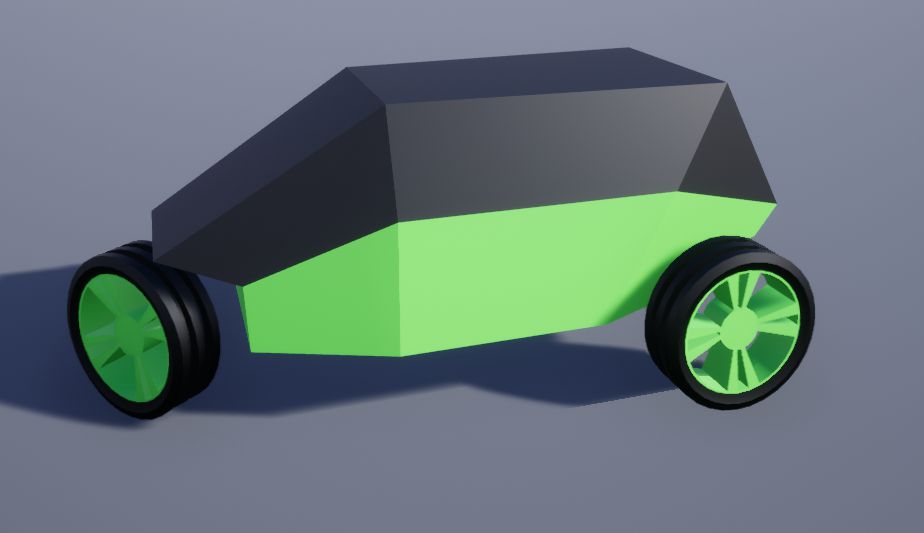
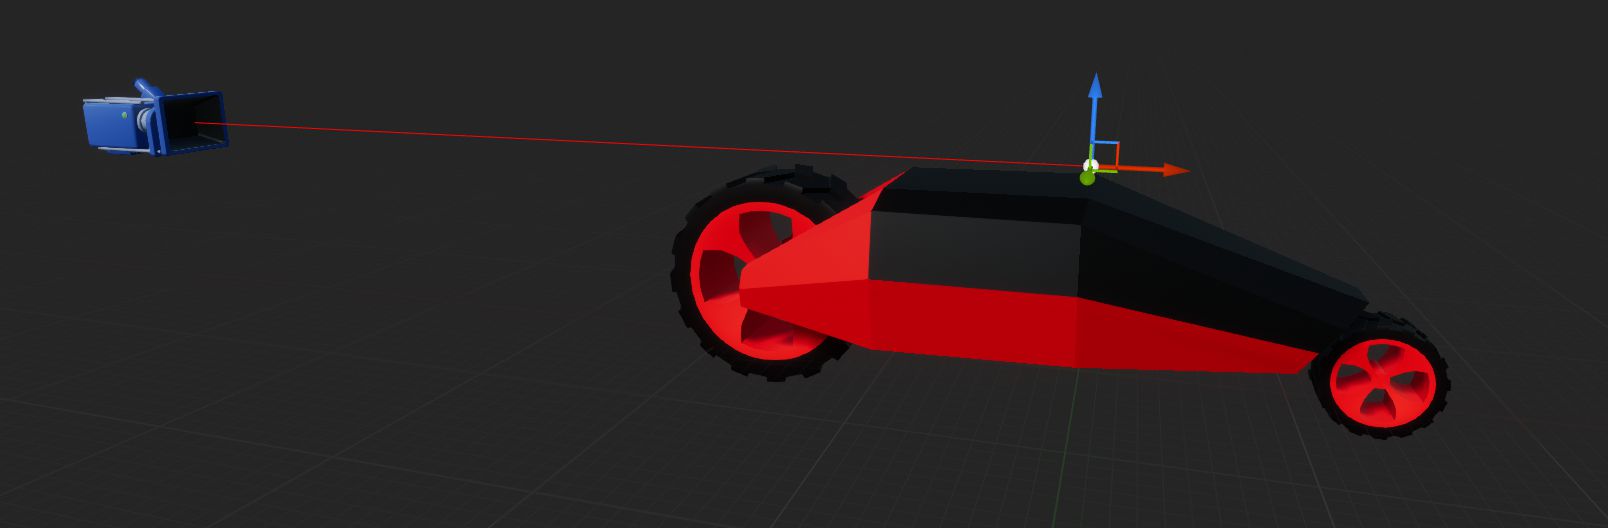
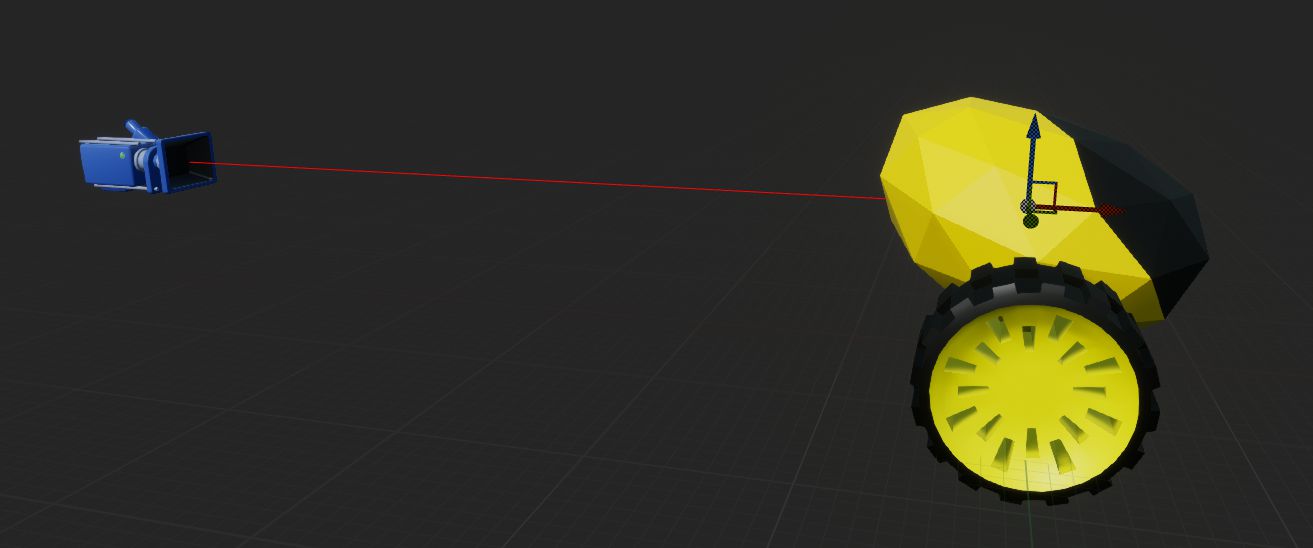
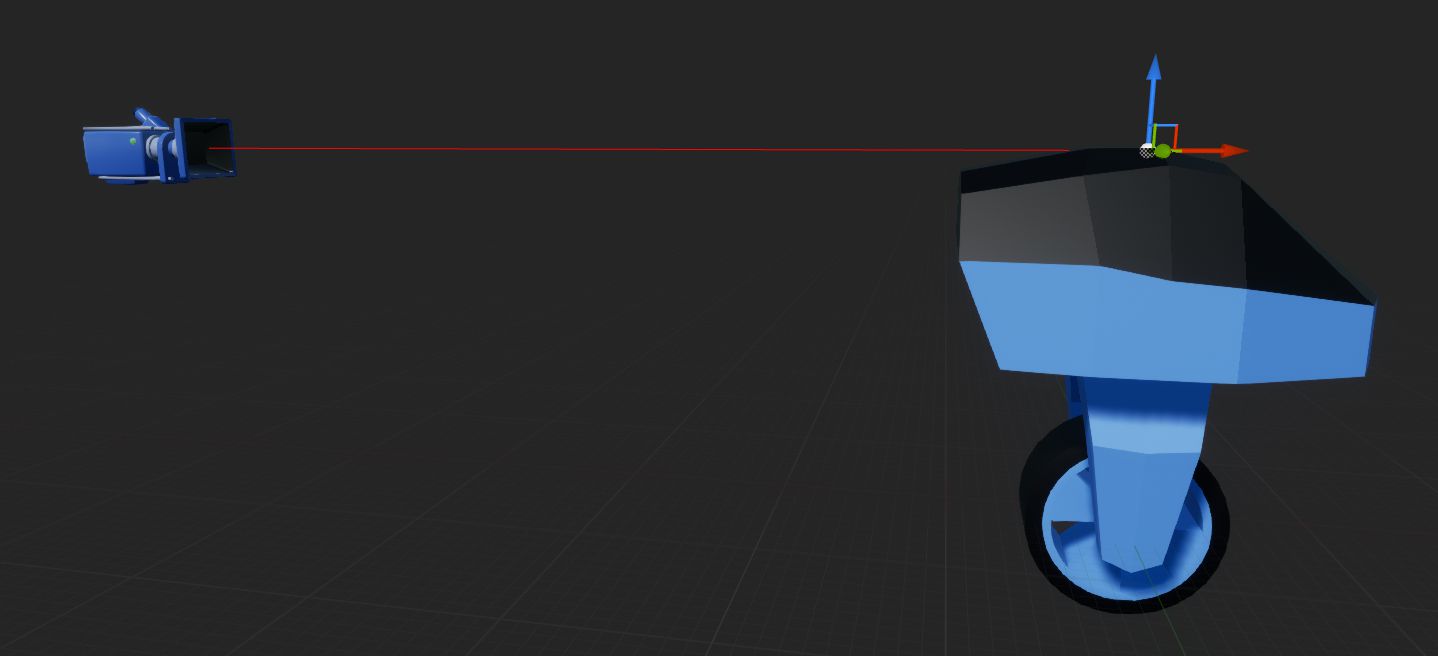
Look in the viewport if the camera and spring arm position looks right for you. Change spring arm's length if it feels too short or too long. In the image below you can see how I have set it up.
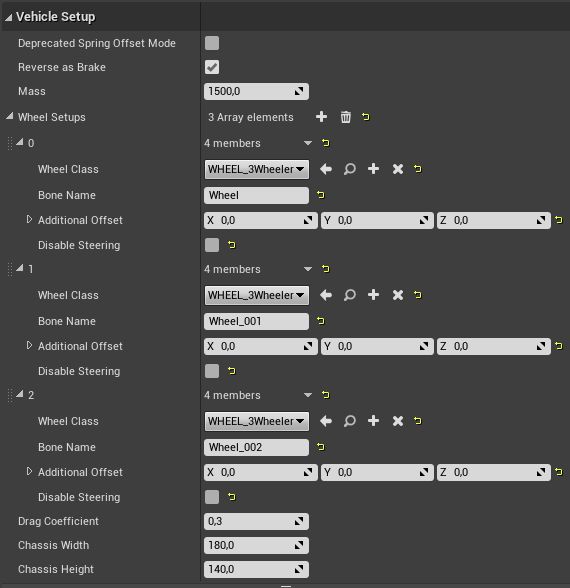
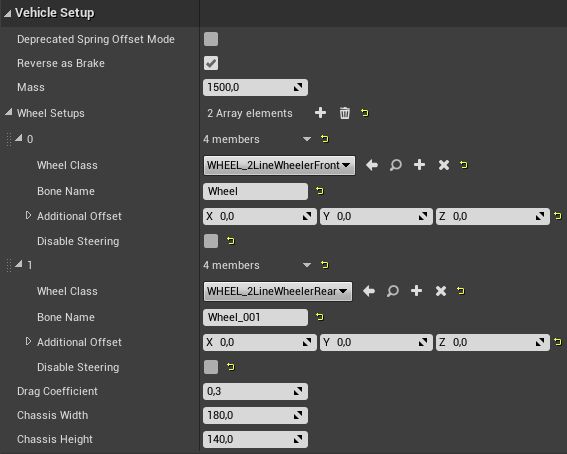
Simple Wheeled Vehicle Movement component needs to have wheels setup, so it could work, so let's do that.
- In Simple Wheeled Vehicle Movement component Details find Vehicle Setup section.
- In the Wheel Setups add as many elements as wheels we will have, in this case - 3.
- Set for each wheel element Wheel Class that we previously made.
- Also, for each element write Bone Name which corresponds to wheel bone name.
If we would put our vehicle in the level, it would have a vehicle like physics, but we could not ride with it, because our inputs aren't set to do anything with the wheels.
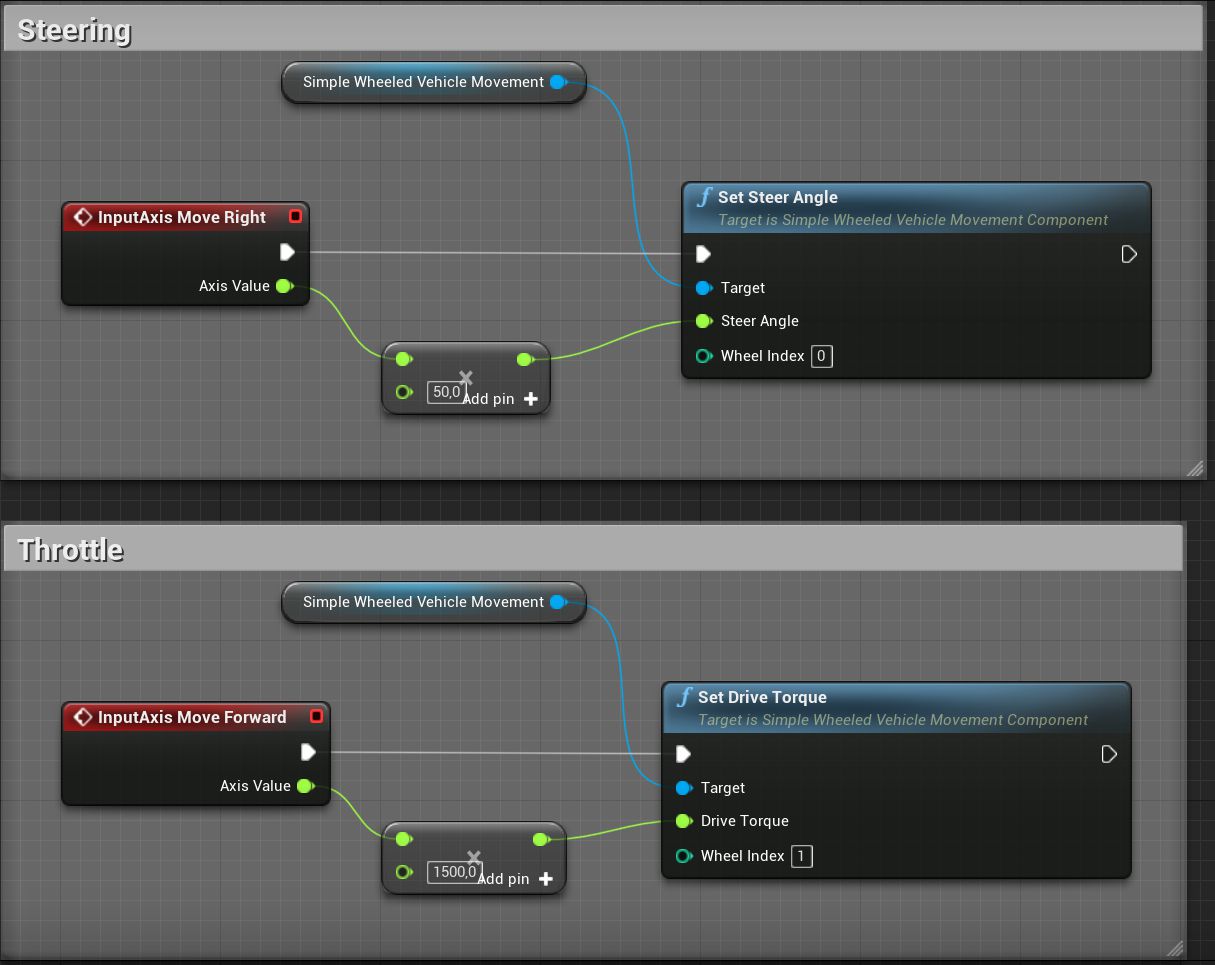
At first, let's set up throttle and steering for our vehicle. Just make blueprints in the Event Graph which you see in the image below.
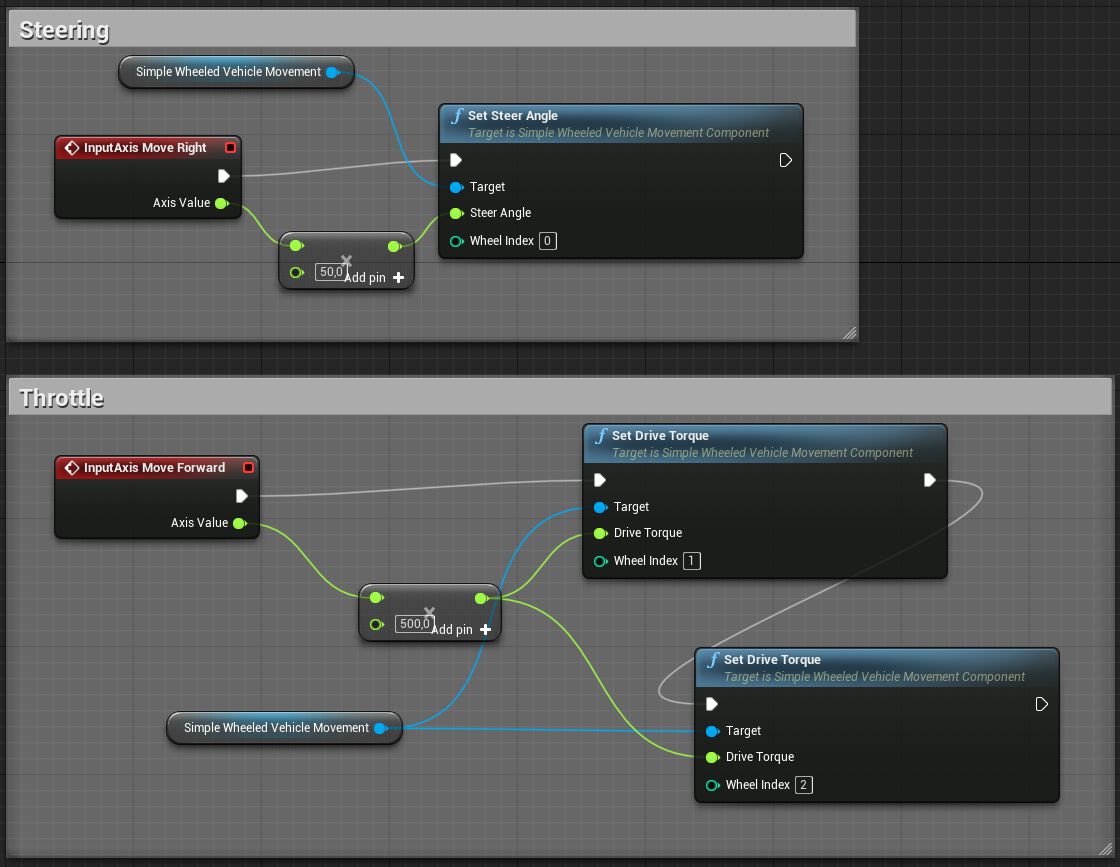
For Throttle and Steering we are using 2 nodes from Simple Wheeled Vehicle Movement component:
- Set Steer Angle
- Set Drive Torque
For each of them, we need to set the Wheel Index, you can find them in Wheel Setups array. Those are just indexes of the wheel elements.
For the Steer Angle, we set up our front wheel index. For the torque nodes, I chose both back wheels, you can set all 3 wheels to have torque, it depends on you. Make sure to adjust indexes to your corresponding wheels.
Also, you can see, that I multiply Move Right axis value by 50. I do that, so the wheel would turn 50 degrees, set a value that suits best for you. Same thing doing with Move Forward axis value, set a value that suits best for you.
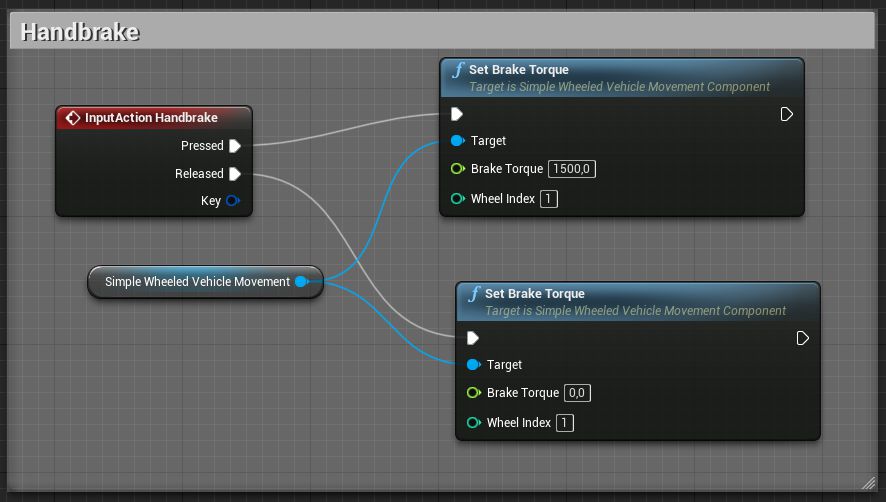
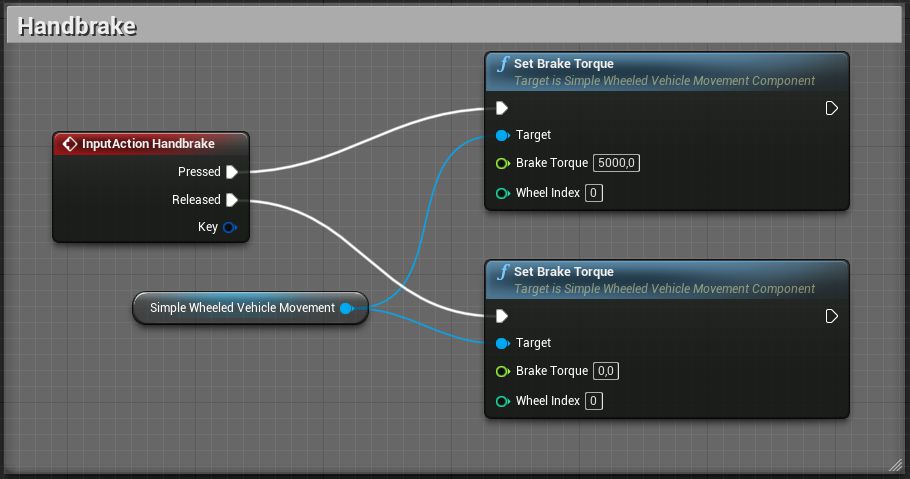
Now our vehicle is set enough that we could actually drive with it if we would put it in the level, but let's add handbrake before. Just make blueprints in the Event Graph which you see in the image below.
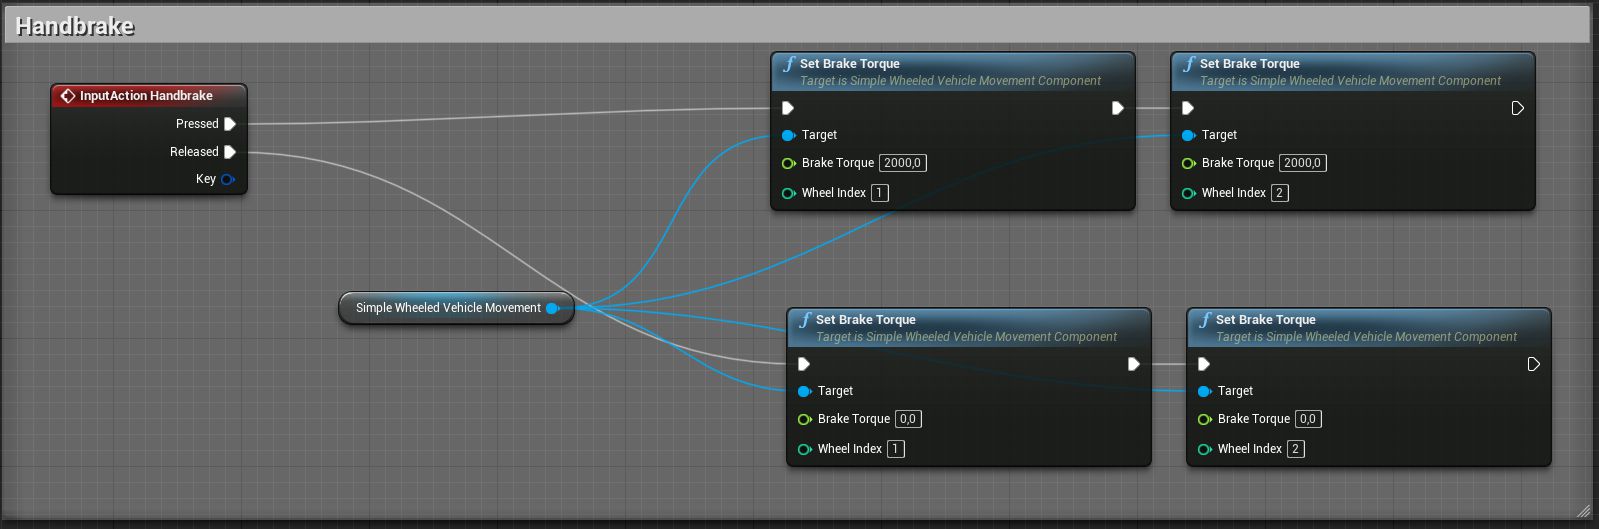
For handbrake, we use Set Brake Torque node. When we press the handbrake input key, we set our back wheel brake torques to some value, and when we release the key, we set brake torque back to 0 so they would not be affected anymore.
Now our vehicle is ready, just put that into the level and set it as default pawn in your game mode or set it to be possessed by Player 0. Then when you play a level, you should be able to drive it around.

Animation blueprint
We also need to make animation blueprint. It's made exactly in the same way, as we did it for previous vehicle. Actually, all vehicle animation blueprints will be made in the same way.
Now we need to set up wheels for our Simple Wheeled Vehicle Movement component.
Because we have different wheels, each of our wheels has its own wheel class.
Steering and Throttle will be set up in really similar way like we did that for the previous vehicle.
As you can see, the principle is the same, but we have fewer wheels which we need to control. Make sure that you put the right wheel indexes in your nodes.
Handbrake also is made in the same principle, just with fewer wheels.
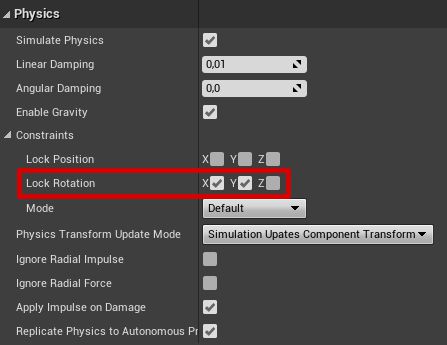
We could put our vehicle in a level and drive with it, but you would see that it would fall on its sides, so we need to enable some physics constraints, so it would not fall on its sides.
- In Skeletal Mesh Details in Physics section under Constraints check Lock Rotation for X and Y axis.

Now our vehicle is ready, just put that into the level and set it as default pawn in your game mode or set it to be possessed by Player 0. Then when you play a level, you should be able to drive it around.
For this vehicle, I have 3 sphere physic bodies.
Animation blueprint
For all vehicles, it will be made in the same way.
- Set up wheels for our Simple Wheeled Vehicle Movement component.

For this vehicle steering and throttle will be a bit more complicated, because we will not turn our vehicle by changing our wheel angle, instead, we will change torques for our wheels to turn the vehicle.
- At first, let's add 5 float type variables to our vehicle blueprint.
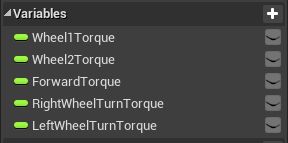
Leave default values for all these variables 0.
- Let's make blueprints at our Event Tick in Event Graph which you can see below, and then I will explain a little bit more how it will work.
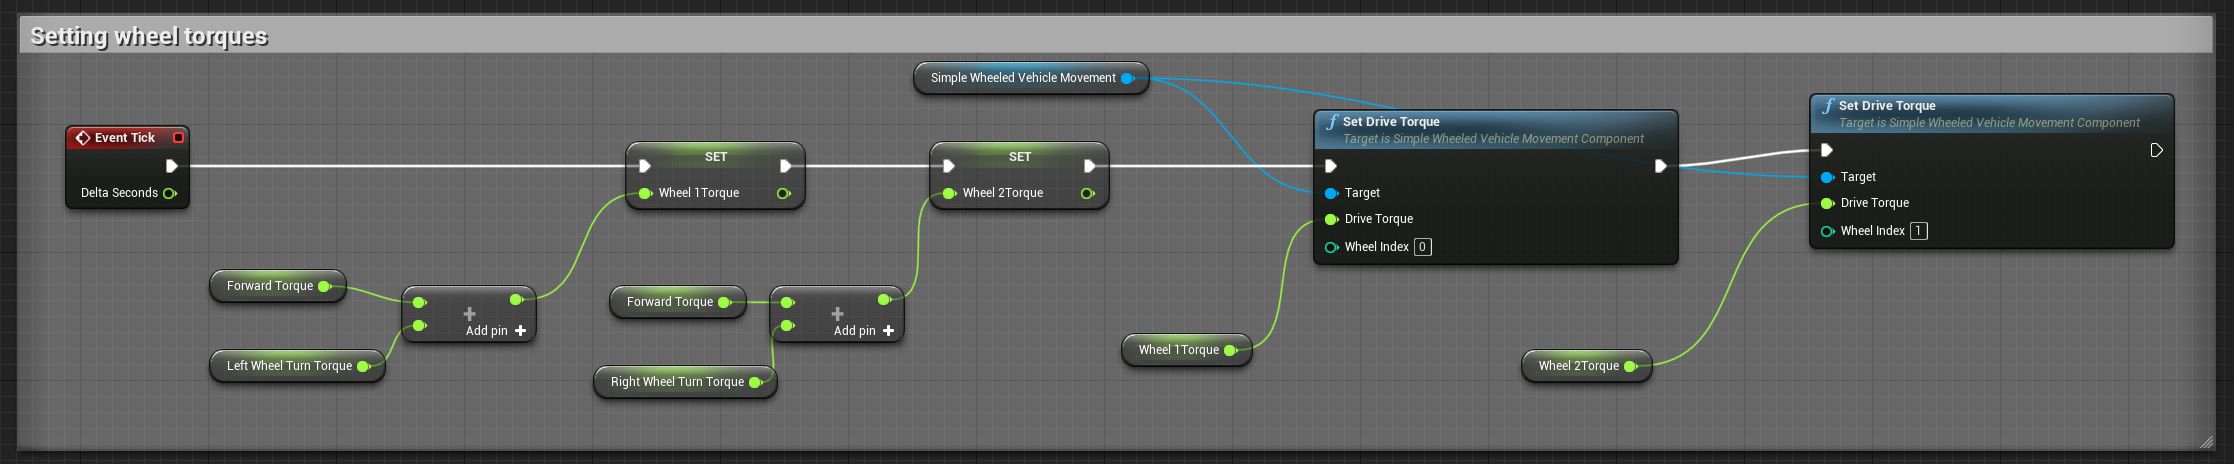
So, as you can see in the blueprint above, in each tick we calculate first and 2nd wheel torque by adding left and right wheel turn torque values to forward torque value. And after that, we use Set Drive Torque node to set each wheel torque.
We set Forward Torque value by our forward movement input. So, if our input is positive, our Forward Torque will be positive, if it's 0, then it will be 0, and so on. We could set those values straight to the Set Drive Torque nodes, but then we could only drive just forward and backward, that's why we need Left/Right Turn Torque variables.
We set Left/Right Turn Torques when we use steering input. If we want to steer to one side, we change one side torque to a positive value and the other side to negative. If our forward torque is 0, we will rotate on the place, but if we are driving forward, it will make one wheel have bigger torque than the other one, so one side will move faster and our vehicle will turn to one side.
Let's have a look at how that will look in the blueprints.
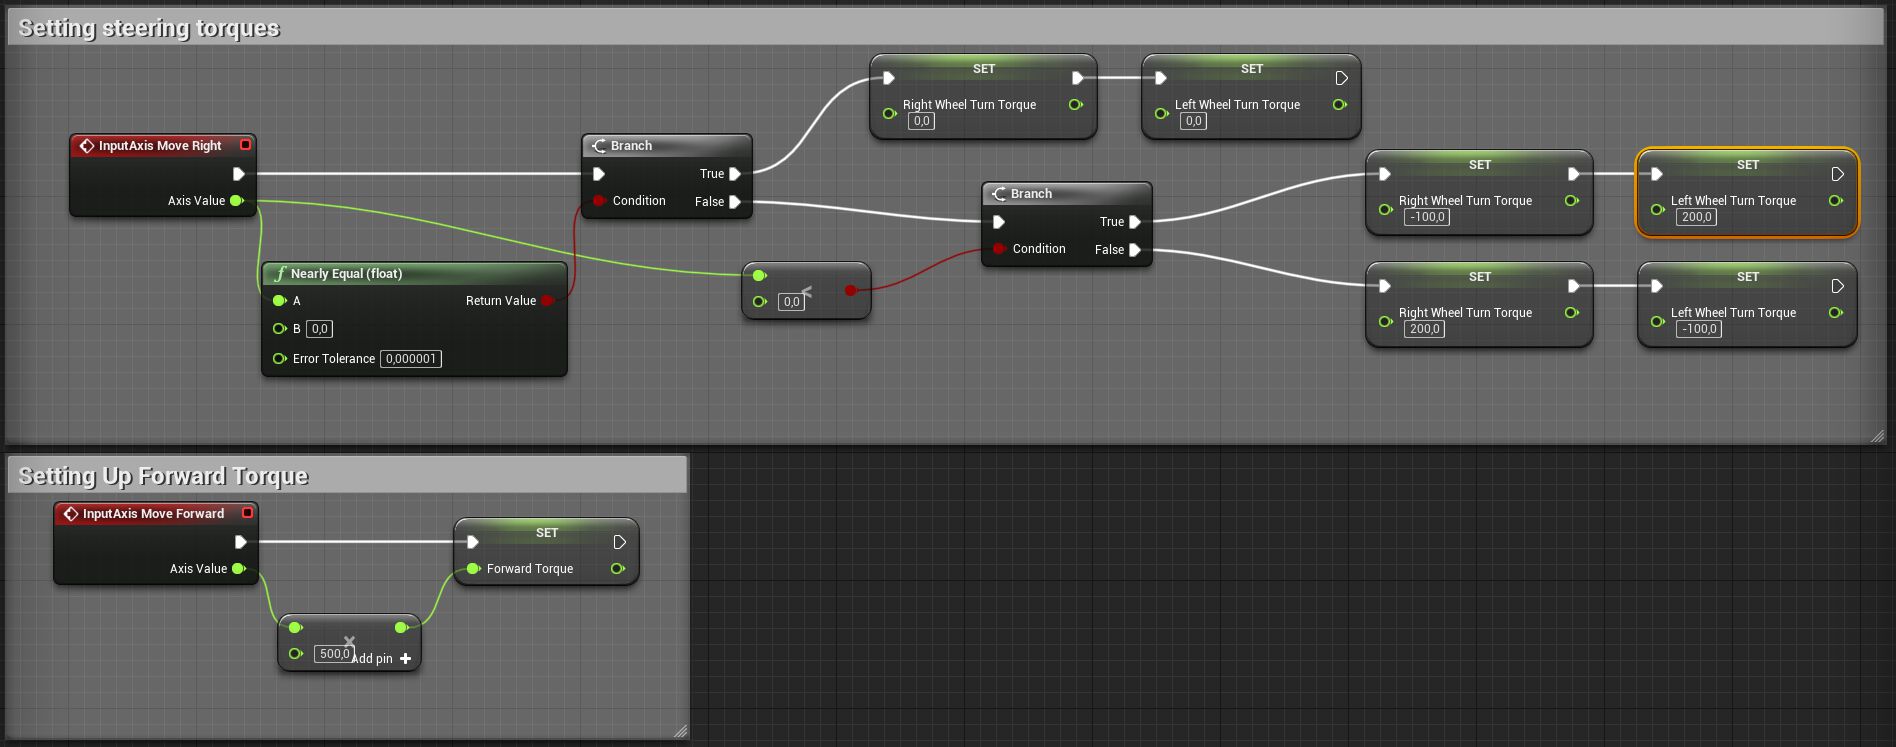
You can see that I have set forward torque multiplier 500 and for turn torques 200 and -100. Change them to what suits best for you.
Also, if you would try to drive backward and turn, you would see, that our steering backward are opposite to used vehicle turning, but you can fix that by adding one more if statement for checking if our forward torque is positive and negative and then switching values to which we need.
Handbrake is made using the same principle as we did for previous vehicles.

We could put our vehicle in a level and drive with it, but you would see that it might roll on its own and we would lose control of it fast. So we need to enable some physics constraints.
- In Skeletal Mesh Details in Physics section under Constraints check Lock Rotation for Y axis.

Now our vehicle is ready, just put that into the level and set it as default pawn in your game mode or set it to be possessed by Player 0. Then when you play a level, you should be able to drive it around.
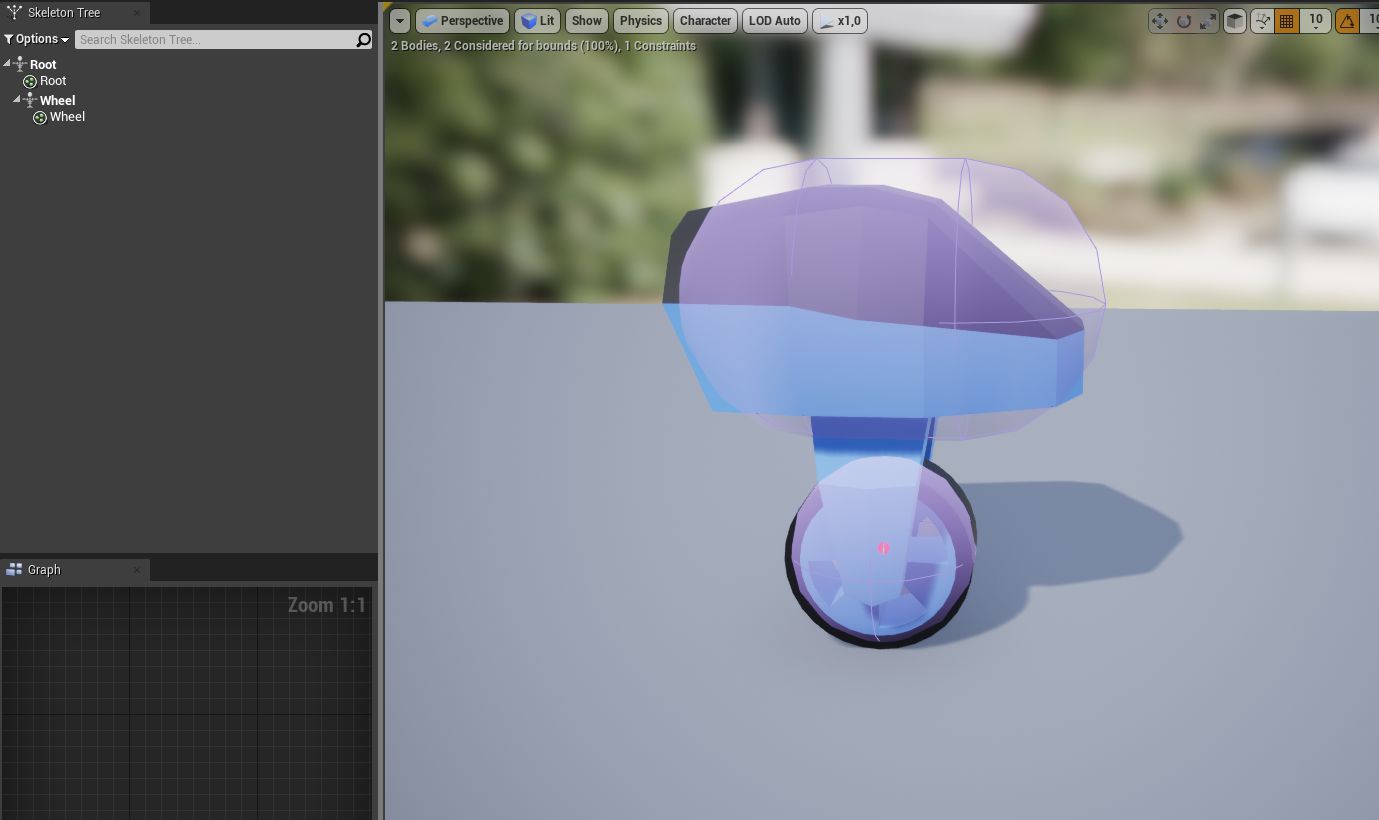
For this vehicle 2 physic bodies, one for wheel and one for the vehicle base.

Animation blueprint
For all vehicles, it will be made in the same way.
Set up our only wheel for our Simple Wheeled Vehicle Movement component.

For this vehicle, we will have throttle set up in a similar way as previous vehicles, but the steering will be set up using a different method.

I think that for throttle I don't need to explain much. I explained that for 3 wheel vehicle. But for steering we are now using Add Torque Degrees node to Skeletal Mesh. It's probably not the best way to rotate, but for our simple example, it works.
Handbrake is made using the same principle as we did for previous vehicles.
If we will try to drive this vehicle now, it will fall to sides, so we need to add some physic constraints to it.
- In Skeletal Mesh Details in Physics section under Constraints check Lock Rotation for X and Y axis.
It's ready for a test drive in a level.

Animation blueprint
For all vehicles, it will be made in the same way.
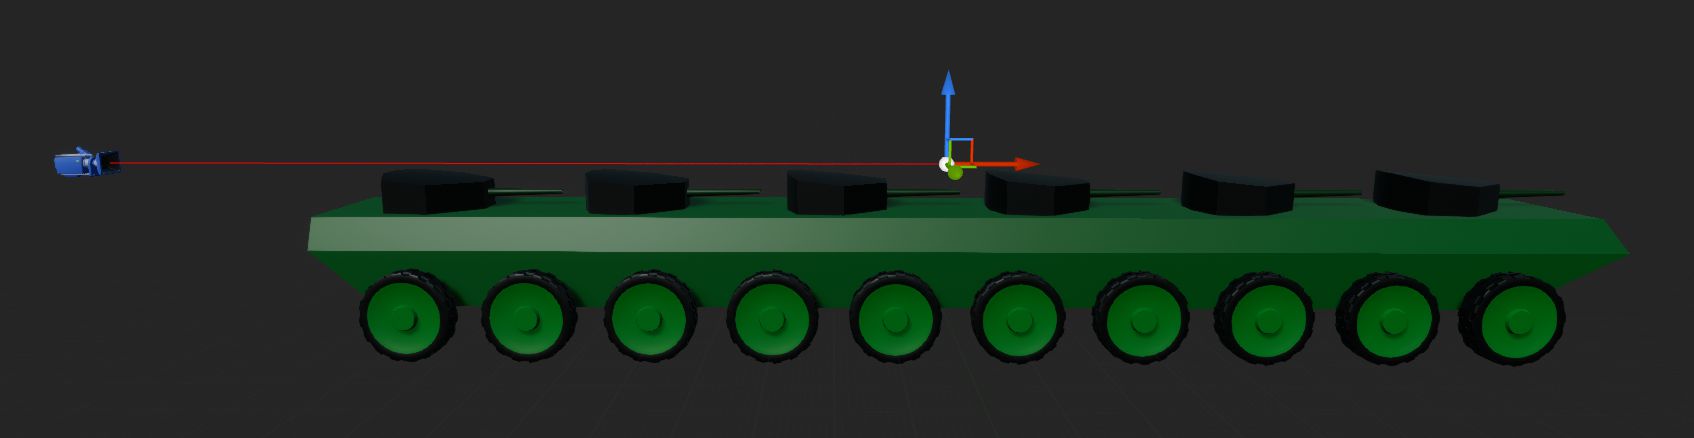
Simple Wheeled Vehicle Movement will need to have 20 wheels set up. I'll show the first few wheels because I don't want to put here a really long image which is really repetitive.
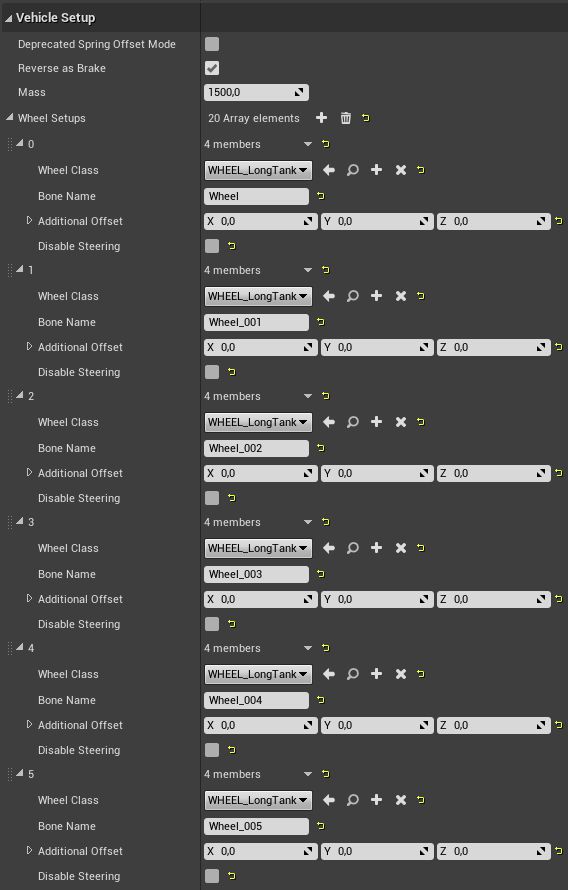
Here are the first five wheels. The next 15 wheels have their bone name number changed if you use my model. The first 10 wheels are from one vehicle side and the other array is from the other side.
For this vehicle, we will have throttle and steering made in the same way as we did that for 2 wheel vehicle with wheels on the side.
- We will have 5 float variables.

Event Tick will be similar to 2 wheel vehicle, but instead of using Set Drive Torque node 20 times, we will use For Each Loop to go through our wheel array, and we will find on which side is each vehicle by checking Array Index.
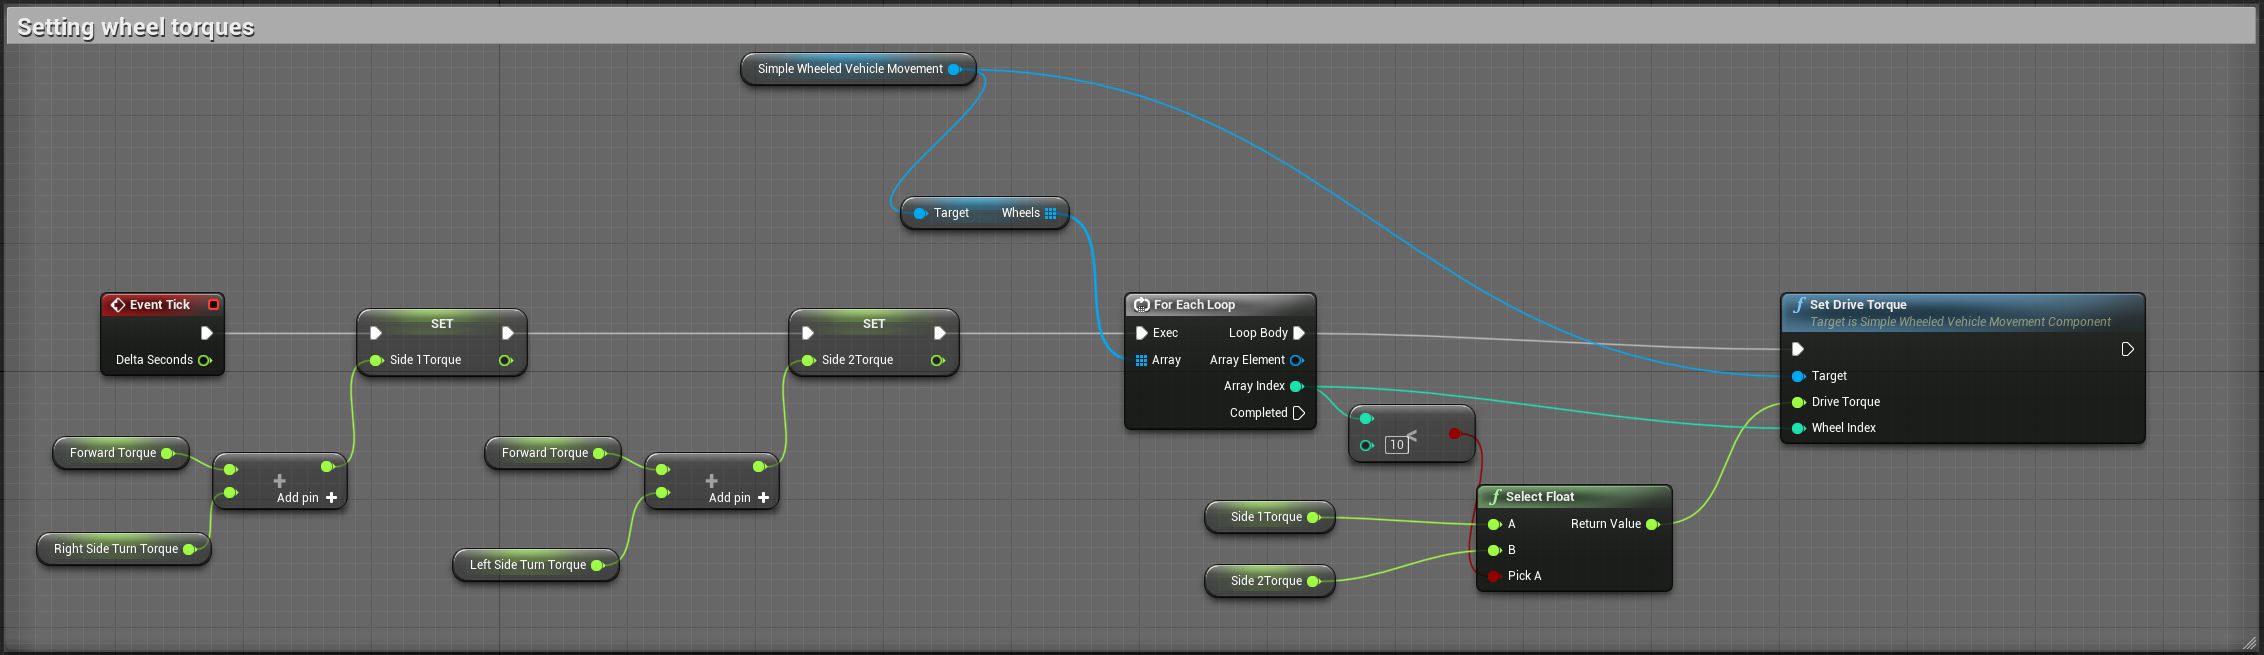
Setting steering and forward torque variables are done in the same way as we did for 2 wheel vehicle.

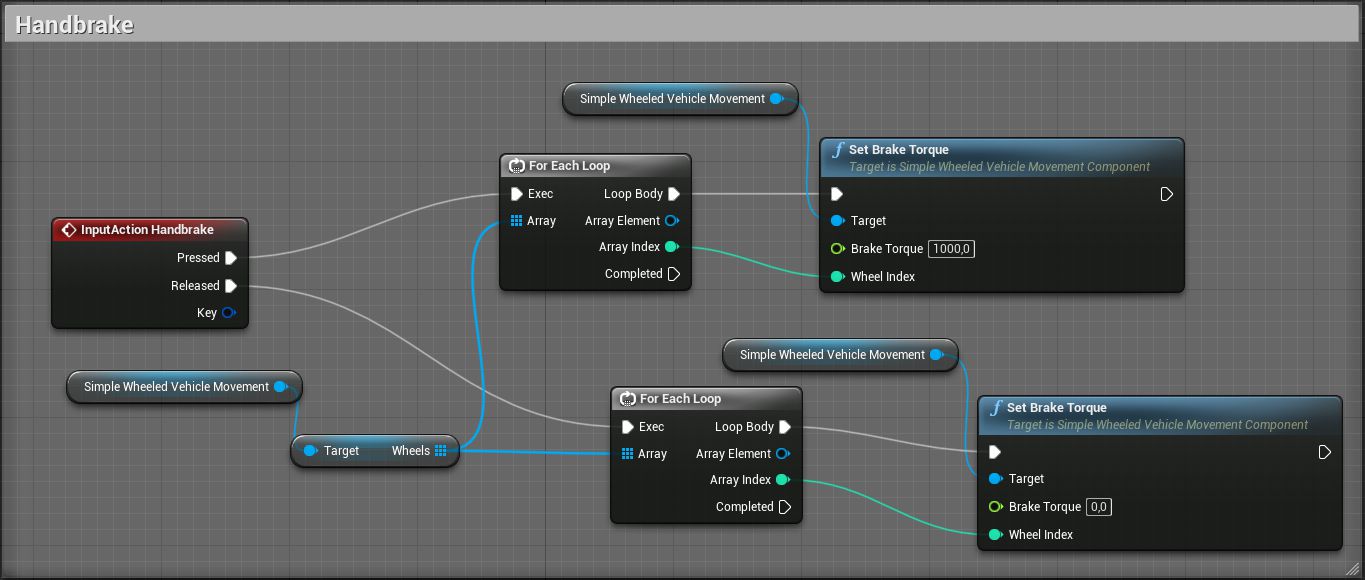
Handbrake is made using the same principle as we did for previous vehicles. But we are using For Each Loop for it, instead of using individual Set Brake Torque nodes.
Now you can drive it in a level. You will see that it barely turns and you should add more complex steering for it if you want to turn it normally, but I didn't want to make it too complex.
Share on
Related Creations
Related Articles
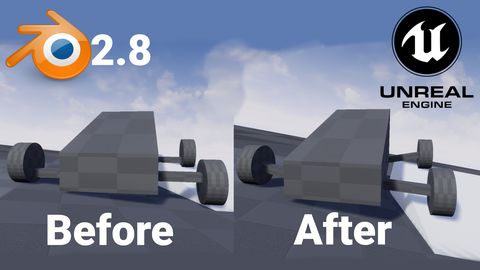
How to get simple suspension animation for vehicle in UE4 with Blender 2.8
Tutorials Blender Unreal Engine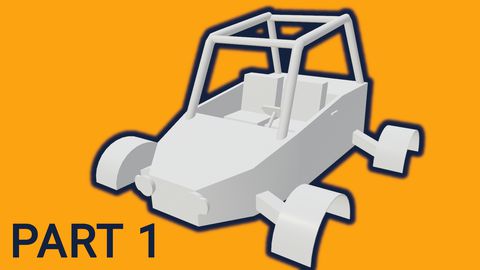
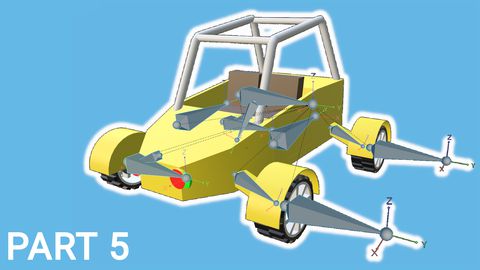
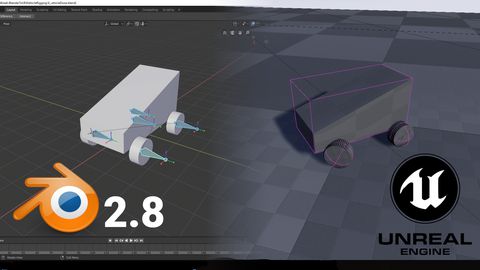
Rigging the vehicle model in Blender | [Part 5] Low poly vehicle for UE4
Tutorials Blender Unreal Engine
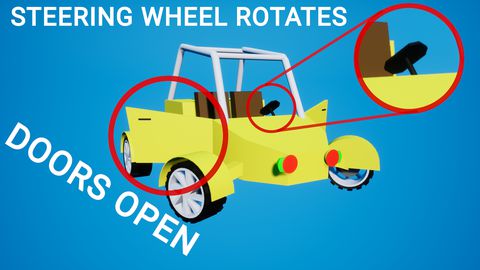
Making openable doors and animated steering wheel | [Part 8] Low poly vehicle for UE4
Tutorials Unreal Engine