How to get simple physics simulation animation from Blender 2.8 to UE4
by Arthur Ontuzhan
Posted 7 years ago Last edit 2 years, 3 months ago
Categories: Tutorials Blender Unreal Engine Tags: Blender 2.8 UE4 Animation
Table of contents
- Introduction
- Prerequisites
- Creation of animation in Blender
- Importing asset in UE4
- Short version
- Video
Introduction
Why would you even want to use in your game pre-made physics simulation animations when UE4 already offers you physics engine in it? There are two main reasons why you would want to use them:
- It takes less computing power to play a pre-made animation than simulating it again.
- You get more control. Every time when you will play animation it will be the same. If you simulate it in real time, it might be slightly different every time.
If you feel that you are pretty well familiar with a blender and UE4 and you don't want to read this whole thing, there is a really short version near the end of this article. Click here to get there faster.
Also, there is video at the end where I show the whole process.
Prerequisites
- Blender 2.8 or newer installed. (As I am creating this tutorial, I am using Blender 2.8 RC version, but it should not differ much in a stable release or newer versions.)
- I am using Unreal Engine 4.22.3, but older versions also should work.
- Basic knowledge of how to use Blender and UE4.
Creation of animation in Blender
Project setup
At the start, we need to have an empty Blender project. To get that, we have to open a new project, and then select everything and delete it.
- I prefer to do that by once pressing A key, then pressing X and then accepting deletion by hitting Enter or by mouse click.
- Or just do that your way.
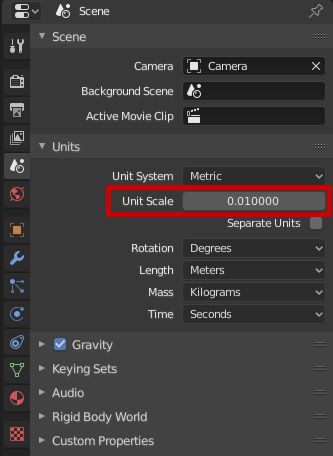
After we have a clean empty project, we must change the scene Unit Scale to 0.01.
- We can find Unit Scale in the bottom right side of the Blender window. There we should select Scene tab, expand Units section and we will see Unit Scale value, which by default is 1. Also, make sure that the Unit System is set to Metric because UE4 uses metric system.
We changed this value, because UE4 one unit is equal to 1 cm, but in Blender default unit value is 1 meter, that's why we scaled it down to 1 cm. If you have exported models from Blender to UE4 before, you might think you didn't do this and all worked as expected to you, then probably you didn't used armatures in your models.
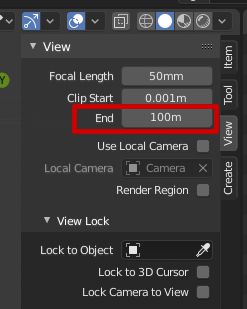
After Unit Scale change, there will occur a problem in a 3D viewport, that we cannot see objects from further distances. This happens because with changing Unit Scale also 3D view end clipping distance changes.
Clipping distance determines how far and near we can see objects from our viewport camera in our scene. That's why we need to increase it.
- To increase 3D view Clip End distance, we need to press N key, which will open the properties menu on the top right corner of the 3D viewport. There under the View section, we will see the End value, which will be set to 10m. I usually set it to 100m, because I am too lazy to add more zeros. Most of the time 100m is enough for me to move a camera around. If this distance is not enough for you, you can always increase it, by default it's set to 1000m.
Creation of the simulation
Now when our project is set up for UE4, we can create our simulation. Our simulation will be made up of the monkey head (Suzanne) falling on the floor.
At first, we need to create a floor, in our case, we will use a plane as our floor. I will create it using these steps:
- Add plane - press Shift + A and then in Mesh sub-menu select Plane.
- Scale plane bigger - press S and type 3, press Enter.
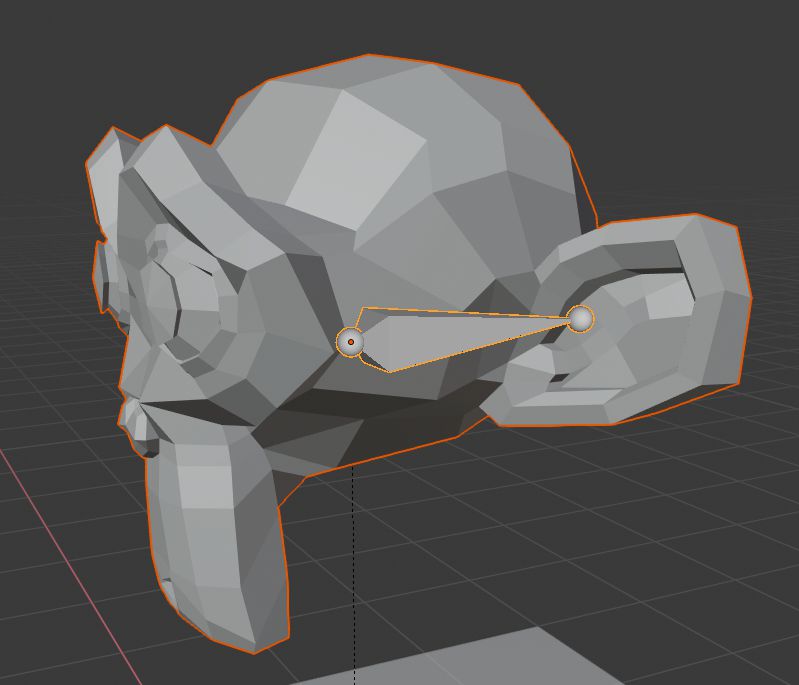
Now we need monkey head (Suzanne) which will fall on the plane which we created. I will create it using these steps:
- Add monkey head - press Shift + A and then in Mesh sub-menu select Monkey.
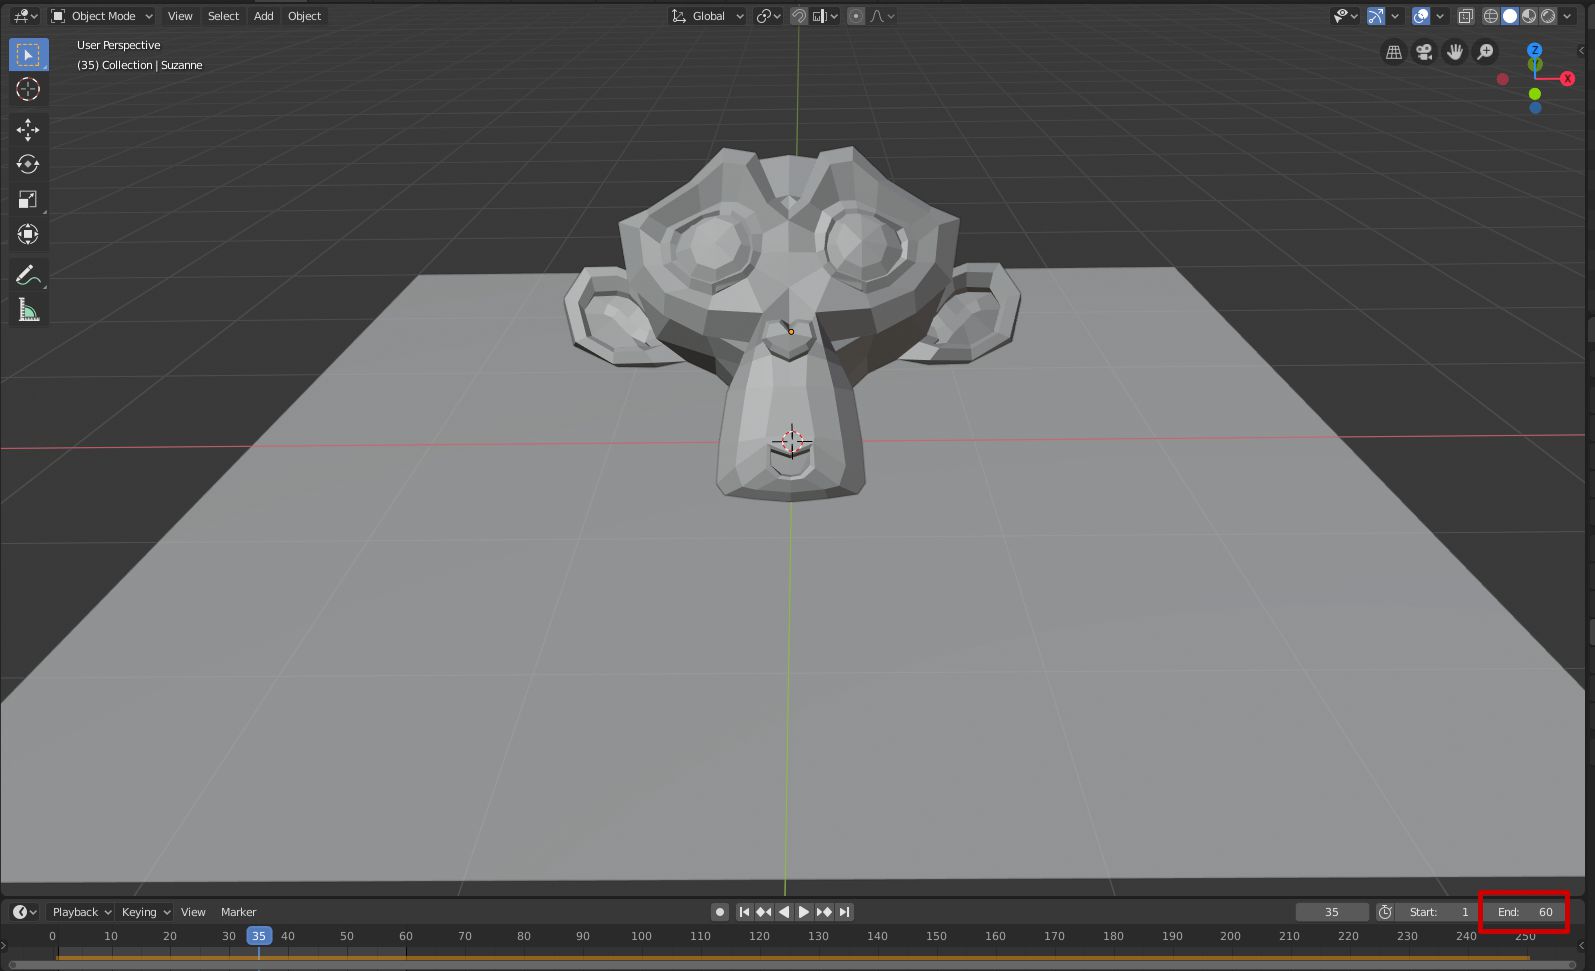
- Move it higher - press G then Z and type 3, press Enter.

If you followed my steps, you should have a similar result as in the image above.
Now we need to set our objects as Rigid Bodies so they would react as physic objects. At first, we will set monkey head (Suzanne) as our Active Rigid Body:
- Make sure the monkey head (Suzanne) is selected.
- In the Properties tab (in the bottom right side of the Blender window) open Physics tab.
- Click on the Rigid Body button.
- Change Collisions Shape to Mesh.
And we need to set our plane as Passive Rigid Body, so it would not react to gravity and stay in its place:
- Select plane.
- In the Properties tab (in the bottom right side of the Blender window) open Physics tab.
- Click on the Rigid Body button.
- Change Type value to Passive.

Now if we will press Play Animation button or Spacebar, we might expect that our monkey head (Suzanne) will fall on the plane, but when we do that, we see that monkey head (Suzanne) is falling down way too slow as we expected.
That's because we changed Unit Scale 100 times smaller than original, so also our physics are working slower. We can fix it by changing Rigid Body World Speed.
- In the Properties tab open Scene tab and under Rigid Body World set Speed value to 10.
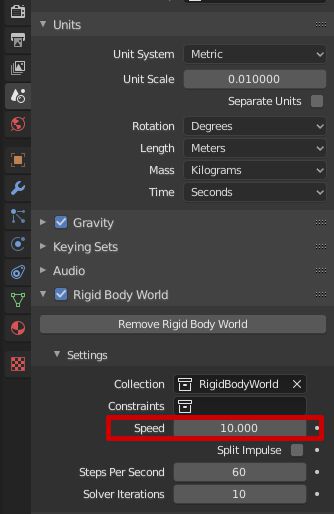
You might have a question why did we set speed to 10, not 100, our Unit Scale is 100 times smaller. Actually, I don't know exactly myself, but I suppose that it's because gravity is measured in m/s2 so we need to take the square root of 100 because time in there is in the square. I don't know the real reason, but if you will test it out, you will see that 100 is way too fast and 10 makes objects move with the same speed as with default unit scale and speed.
Now when will play animation we will see, that monkey head (Suzanne) drops on the ground and maybe if you look longer you will see that it still moves a bit. By default, our animation is 250 frames long, and maybe we don't want it to be so long. We can do that by changing the End Frame in the Timeline.
- At the bottom part of the Blender window, we can see the Timeline. At the right top corner of it we can set start and end frame values, in my case I will set my end frame to 60.
Making simulation UE4 compatible
To get this simulated animation to UE4, we need to add bones to our animated objects. In our case, we need to add one bone to our monkey head (Suzanne). If we would have more animated objects, we would need to use an armature with one parent bone, which is not animated and where its child bones are attached to animated objects to avoid UE4 root bone error.
At first, we will add armature to our scene and set it so it would be easier to work with:
- In the timeline set our current frame to 1, so monkey head (Suzanne) would hang in the air and would not bother us much.
- Add armature - Shift + A and then select Armature.
- Scale it up so we could see it - press S type 100 and then press Enter.
- Apply scale to it - press Ctrl+A and select Scale.
- Show armature in front of meshes - In properties tab under Object data tab under Viewport Display check In Front checkbox.

We have armature with bone. Now we need to get it animated together with our monkey head (Suzanne). At first, we will get our bone to follow Suzanne:
- While bone is selected enter in Pose mode - press Ctrl+Tab.
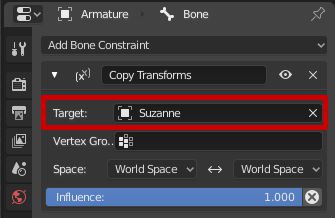
- Make sure bone is selected and in properties tab in Bone Constraints tab add Copy Transforms constrain to the bone.
- In the constrain set Target value to Suzanne.
- Set new pose as rest pose - press Ctrl+A and select Apply Pose as Rest Pose.
Now if we will play the animation, we see that bone is following Suzanne. Now we need to bake this action to keyframes, so we would could save it as animation:
- Make sure that you're in Pose mode and bone is selected.
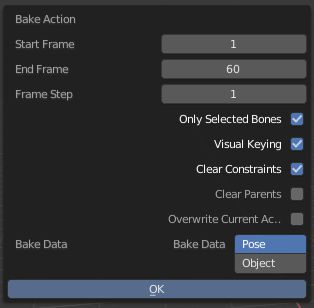
- In the Blender top left corner open Pose menu, go to Animation and click Bake Action....
- In Bake Action window check Visual Keying and Clear Constraints and press OK.
After the action is baked, we can see keyframes in the timeline. Now we can parent our Suzanne mesh to our armature, but at first, we need to remove Rigid Body from Suzanne:
- In the object mode select Suzanne mesh.
- In properties in Physics tab click on Rigid Body button.
Now we can parent our Suzanne mesh to armature:
- In object mode select Suzanne mesh.
- Hold Shift and with left mouse click select armature.
- Press Ctrl+P and in the menu select With Automatic Weights.
Now, if we play animation, we should see that it's the same animation as before, but now Suzanne is controlled by armature animation. At this point, we can export our armature with the Suzanne mesh and import that in UE4, but usually I prefer to push actions which I want to export to NLA. It helps to manage which actions I want to export and on UE4 import I don't get some weird 1 frame animations because I baked animation without selected bone or fir some other reason.
You can skip this step and then on export settings just make sure that you have All Actions checked in the Animation tab, but as I mentioned before, I prefer pushing actions to NLA:
- Make sure that that you have armature selected.
- At the top of the Blender window switch to Animation workspace.
- At the bottom of Animation workspace you should see Dope Sheet, change its editing context to Action Editor.
- Make sure that you have right action selected and then click Push Down button.
- You can return back to Layout workspace.

Exporting asset
Now we can export our Suzanne mesh and import this simulated animation in UE4.
- Select Suzanne mesh and armature.
- Click File->Export->FBX (.fbx).
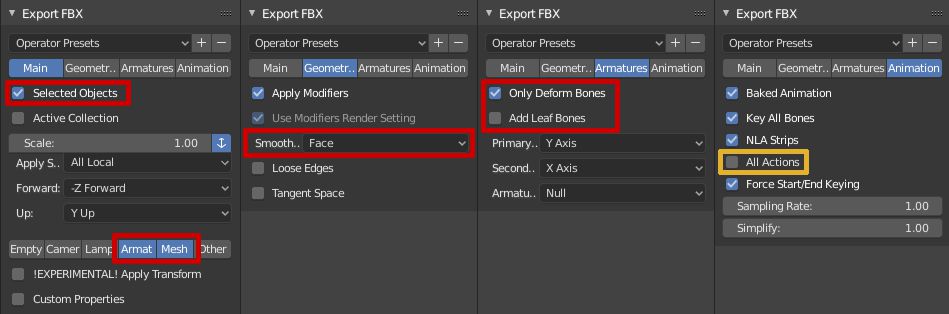
- Make sure, that in the Main section Selected Objects is checked and Armature and Mesh are selected.
- In the Geometries tab set Smoothing to Face.
- In the Armatures tab check Only Deform Bones and uncheck Add Leaf Bones.
- In the Animation tab uncheck All Actions if you pushed your actions to NLA, if you skipped that step, leave it checked.
- Choose a place and name for your file and press Export FBX.
Importing asset in UE4
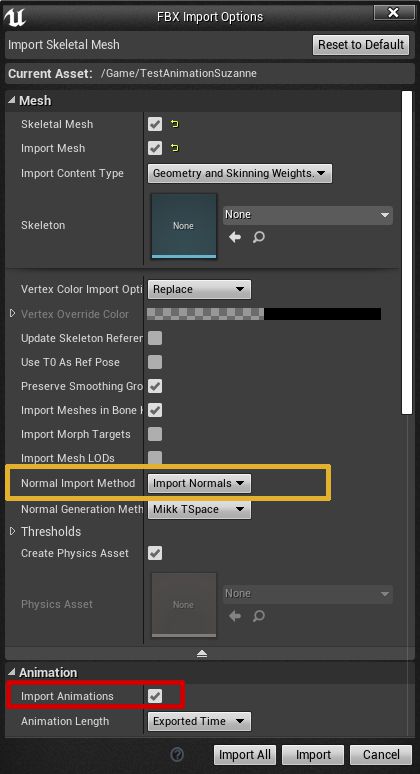
We need to make small changes in UE4 import options, to get animation imported:
- Make sure that Import Animations is checked.
- Set Normal Import Method to Import Normals. In our case, this option will not change much, but sometimes, if you use some modifiers in Blender, like Auto Smooth, you might get some shading issues on the imported model if you don't change this. So this one might save you some time in the future.
After import, you should get several new items in your content browser and one of them should be Animation Sequence which contains the animation data.
Short version
I made this short summary for those who don't want to read so much and feel pretty familiar with the Blender and UE4.
- Set project Unit Scale to 0.01 and Clip End distance to 100m.
- Add 2 objects to the scene:
- Plane as ground.
- Suzanne or any other object which will be an active object.
- Set added objects as Rigid Bodies:
- Set the plane as Passive Rigid Body.
- Set active object as Active Rigid Body.
- In the Scene tab change Rigid Body World Speed to 10.
- Check if you are ok with your simulation.
- Add armature to the scene. If you scale it up, make sure that you Apply Scale to it.
- Add Bone Constraint to Armature Bone to Copy Transform from the active object.
- Apply new bone position as new rest pose - Apply Pose as Rest Pose.
- Bake bone action - Pose -> Animation->Bake Action and make sure that Visual Keying and Clear Constraints are checked.
- Remove Rigid Body from active the object.
- Parent active object mesh to the armature With Automatic Weights.
- Now your asset is ready for export.
Video
Share on
Related Articles
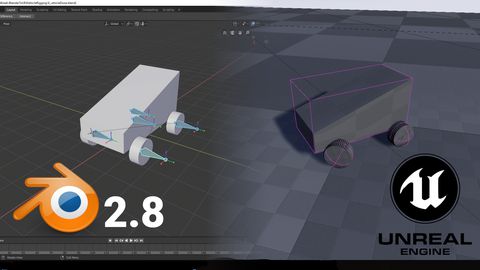
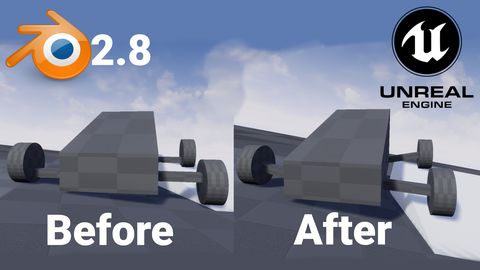
How to get simple suspension animation for vehicle in UE4 with Blender 2.8
Tutorials Blender Unreal Engine