How to Save & Load Custom Unreal Engine 5 Settings EASY with C++ | Beginner Tutorial
by Arthur Ontuzhan
Posted 3 years, 5 months ago Last edit 2 years, 10 months ago
Categories: Tutorials Unreal Engine Tags: UE5 C++ Settings
Programming IDE
The first thing you need is Visual Studio or some other programming IDE that's set up for Unreal Engine development on your PC. If you don't have that set up on your PC, the Unreal Engine documentation has a guide on how to do that. Or just look up some tutorials on how to set it up.
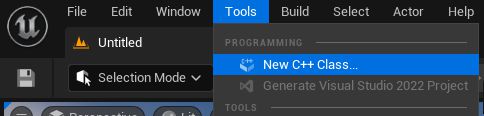
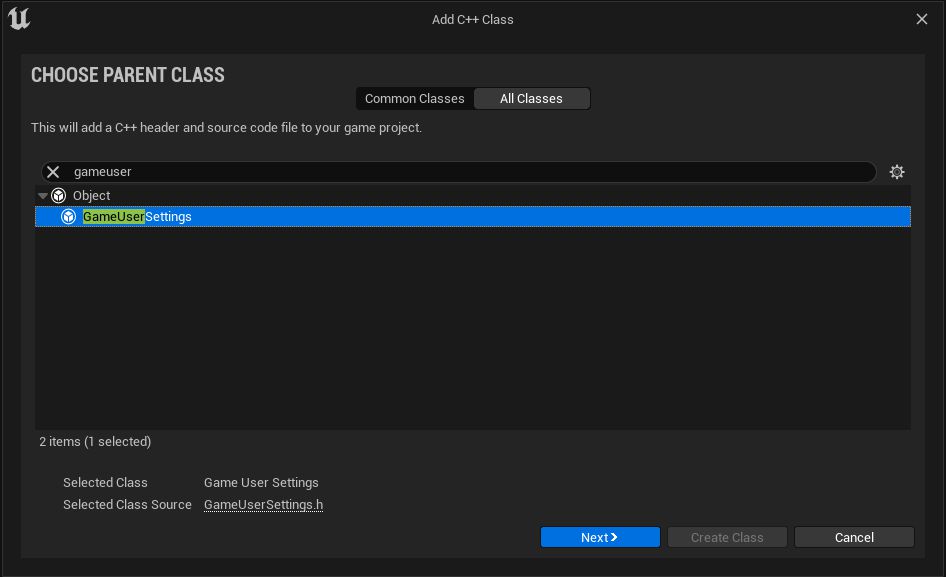
Then All Classes, and then, as a parent class we need to select the Game User Settings class. Then click next.
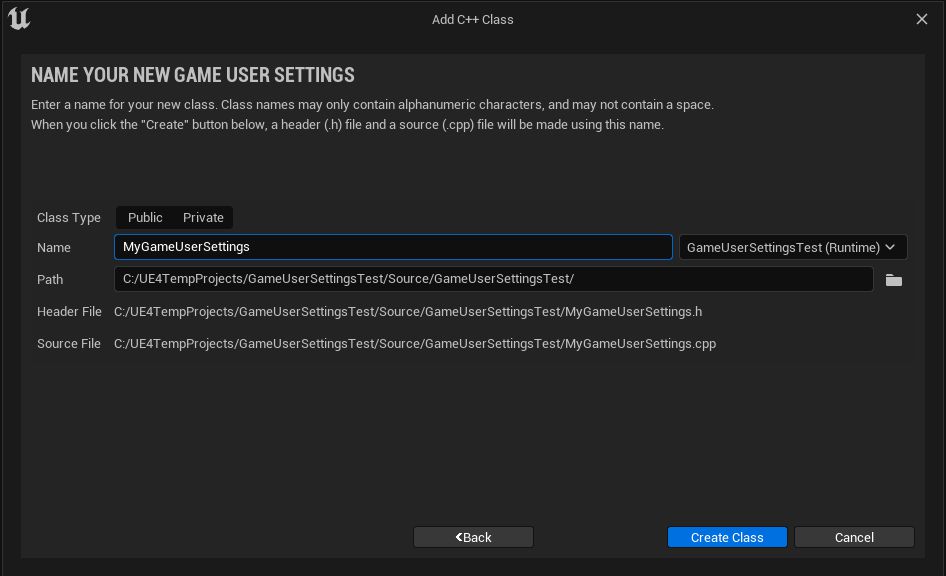
Choose a name for your class. I'm ok with a default name, so I will leave it as it is. And then we can click the create class button. It will take some time until the class generation is done.
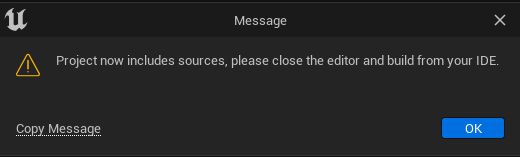
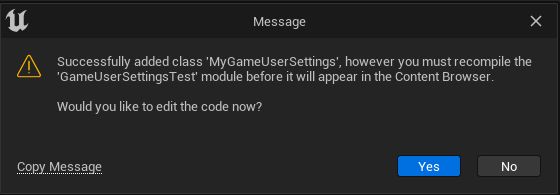
Because our project was a blueprint only, we will see a warning message telling us to close the editor and build it from our IDE. Press OK.
Then we will get a message asking if we want to edit the code now. Press yes, and after some time your IDE should open; in my case, it's Visual Studio 2022.
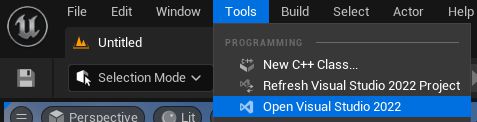
You can also open your programming IDE from the Unreal Engine editor's Tools menu, or you can open a Visual Studio solutions file from your projects folder.
Now, before we write code, we should close the Unreal Engine editor.

Let's explore two ways we can add variables to your game settings and use them in blueprints. The first thing we need to do is declare the setting's variable. To do that, In the header file (.h file), after the line GENERATED_BODY(), we need to add the following code.
protected:
	UPROPERTY(Config)
FString CustomSettingVariable1;- UPROPERTY(Config) means that we are declaring a variable that will be saved in the config file.
- FString defines that our variable is of string type.
- CustomSettingVariable1 is our variable name. Just remember to put a semicolon after your variable name.
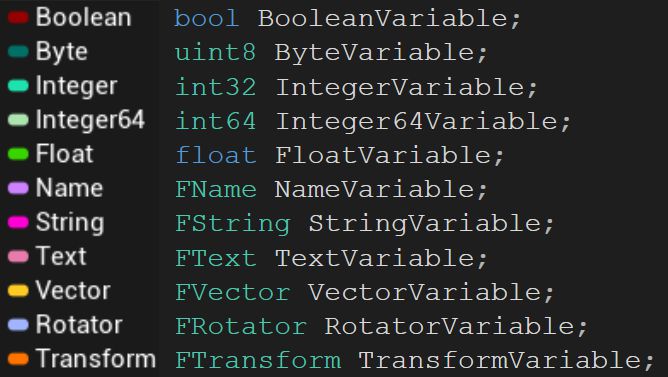
If you want to use other variable types, here’s a list of the most common blueprint types and what you would need to type for them.
If we would compile this code right now, we wouldn't be able to access this variable in blueprints, so we need to make getter and setter functions that we can access in blueprints. Let's start by defining setter.
To do that, In the header file (.h file), after the line GENERATED_BODY(), we need to add the following code.
public:
	UFUNCTION(BlueprintCallable)
void SetCustomVariable1(FString NewValue);- UFUNCTION(BlueprintCallable) means that we are declaring a function, that we will be able to call in blueprints.
- void defines that our function is void type cause it's not returning anything.
- SetCustomVariable1 is our function name.
- (FString NewValue) defines that our function will take one string type parameter. Just remember to put a semicolon after your function name.
With just a definition in the header file, our function will not do anything, so we need to write what it does in the CPP file. To make the function's definition in the CPP file, in Visual Studio, we can right-click the function's definition and then click Quick Actions and Refactorings....
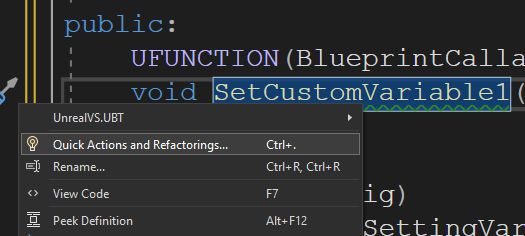
Then click Create definition of 'YourFunctionName' in YourCPPFileName.cpp.
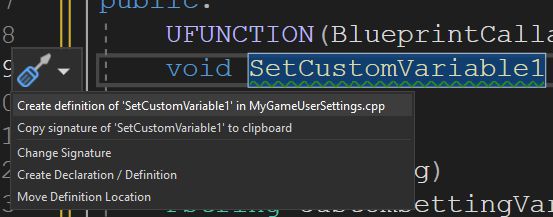
Now we will see that Visual Studio opened a small window that shows us the definition of the newly generated function in the CPP file. We can edit that in this small window, or just close it and open the CPP file. Your CPP file should look like this now.
#include "MyGameUserSettings.h"

void UMyGameUserSettings::SetCustomVariable1(FString NewValue)
{
}
If you want to define a function manually in the CPP file, your function should consist of the following parts:
- void - function type, it needs to match the one from your header file.
- UMyGameUserSettings - class name, you can find in the header file in the line where class is defined. Also after class name you need to type 2 colons ::.
- SetCustomVariable1 - your function's name, just like in the header file.
- (FString NewValue) - your function's parameters defined in round brackets just like in the header file, and after it you open and close curly brackets {} in which all function logic will be written.
In this function, we want to update our settings value with a new value. To do that, we need to write that our previously defined variable is equal to the function's parameter and end that with a semicolon.
void UMyGameUserSettings::SetCustomVariable1(FString NewValue)
{
	//Add this line below
	CustomSettingVariable1 = NewValue;
}
Now, in a similar manner, we need to make a getter function. First, we define it in the header file under the setter function.
UFUNCTION(BlueprintPure)
FString GetCustomVariable1() const;- UFUNCTION(BlueprintPure) means that we are declaring a function that we will be able to call in blueprints as a pure function. Pure functions are generally used for getter functions. The image below shows how pure and regular functions appear in blueprints. Also, pure function nodes do not cache their results.
- FString defines that our function is string type because we want to return a string value with it.
- GetCustomVariable1 is our function name.
- () We don't need any parameters for it, so that's why we have empty round brackets.
- const- With the const keyword, we declare that this function will not modify anything in this class, including its variables. It would work completely fine without the const keyword next to it, but it's good programming practice to do so.

Now we can add the function's definition to the CPP file. Use Quick Actions menu or just do it manually, however you like it.
FString UMyGameUserSettings::GetCustomVariable1() const
{
	return FString();
}
We can see that the const keyword is also added to this declaration and that this function returns an empty Unreal Engine string object because this function's type is a string. We want this function to return the value of our setting variable, so we need to replace this empty string object with our previously defined variable; just make sure not to lose the semicolon at the end.
FString UMyGameUserSettings::GetCustomVariable1() const
{
	//Set your variable in the line below
	return CustomSettingVariable1;
}UCLASS()
class GAMEUSERSETTINGSTEST_API UMyGameUserSettings : public UGameUserSettings
{
//Change this line
GENERATED_UCLASS_BODY()
//You can see the full finished code further in the tutorial.
}Usually, in new Unreal Engine C++ classes, you don't need to change that header line and use this type of constructor with parameters, but in this case, it wouldn't compile without these changes. I'm not really sure why and don't want to spread some false information.
Now we can declare the constructor in the CPP file. Just copy the constructor code and change the class name fields to your class name.
UMyGameUserSettings::UMyGameUserSettings(const FObjectInitializer& ObjectInitializer):Super(ObjectInitializer)
{
}
Now we can set the default value for our setting variable.
UMyGameUserSettings::UMyGameUserSettings(const FObjectInitializer& ObjectInitializer):Super(ObjectInitializer)
{
	//Add this line below
	CustomSettingVariable1 = TEXT("Default Value");
}
We can see that I typed TEXT, then brackets, and only then, in quotes, a string value. We are using TEXT because Unreal Engine says to always use the TEXT macro around string literals; otherwise, we can get undesirable string conversions, and in C++, all strings must be written within quotes. Also worth mentioning is that if you want to have a backslash, single quote, or double quote in your string, you need to put a backslash before them.
Also, here are examples of how we can set values for other variable types.
BooleanVariable = true;
ByteVariable = 255;
IntegerVariable = 69;
Integer64Variable = 420;
FloatVariable = 420.69f;
NameVariable = TEXT("My Name Is Jeff");
StringVariable = TEXT("Deez Nuts");
TextVariable = FText::FromString(TEXT("Joe Mama"));
VectorVariable = FVector(69, 420, 420.69);
RotatorVariable = FRotator(420, 69, 69.69);
TransformVariable = FTransform(FRotator(69, 69, 69.69), FVector(69, 420, 420.69));
Exposing new settings to blueprints
Now our settings variable has a default value, but there's still one issue. If we would compile this code right now, we wouldn't be able to get access to it in blueprints. The Get Game User Settings node returns the Game User Settings class, which is a parent class of our settings class. To get access to our class, we need to make our own function that will return our class in blueprints. We need to declare a static function in the header file under the public section.
UFUNCTION(BlueprintCallable)
static UMyGameUserSettings* GetBetterGameUserSettings();- UFUNCTION(BlueprintCallable) means that we are declaring a function, that we will be able to call in blueprints.
- static will make this function available everywhere in blueprints.
- UMyGameUserSettings* class name with asterisk means that it's a pointer of this class.
- GetBetterGameUserSettings() function name without parameters.
I can't really explain these things in a few sentences, so I recommend doing your own research on this if you want to understand more.
Now we can add the function's definition to the CPP file. Use Quick Actions menu or just do it manually, however you like it.
UMyGameUserSettings* UMyGameUserSettings::GetBetterGameUserSettings()
{
	return nullptr;
}
We need to make it to get the regular game user settings object and then cast it to our class type and return that.
UMyGameUserSettings* UMyGameUserSettings::GetBetterGameUserSettings()
{
	//Add this line below
	return Cast<UMyGameUserSettings>(UGameUserSettings::GetGameUserSettings());
}UPROPERTY(Config, BlueprintReadWrite)
float CustomSettingVariable2;And that's it; we don't need to write any more functions for it. If we want, we can go to the class constructor and declare its default value just like we did for the previous variable.
UMyGameUserSettings::UMyGameUserSettings(const FObjectInitializer& ObjectInitializer):Super(ObjectInitializer)
{
CustomSettingVariable1 = TEXT("Default Value");
//Add this line below
CustomSettingVariable2 = 420.69f;
}But why even bother with the first way of declaring variables if we can do it so much faster this way? Let's say you added a difficulty setting to your game, and you have several places where you can change the difficulty. And one day you decide that you want to add some achievements to the game. Let's say you want to add an achievement where whenever the player has changed the difficulty 69 times, you want to award him with a nice achievement. If you used a public variable for the setting, you now have several places in your project where you need to add some logic to track whether the setting has been updated. You don't have to worry about all the places where the setting is used if you use the getter and setter functions. You already have a place in the code that is called every time your setting variable gets updated, where you can easily add code for your achievement. It's a terrible example of why you should use setters or getters for setting variables, but I can't really explain other benefits without explaining other programming principles.
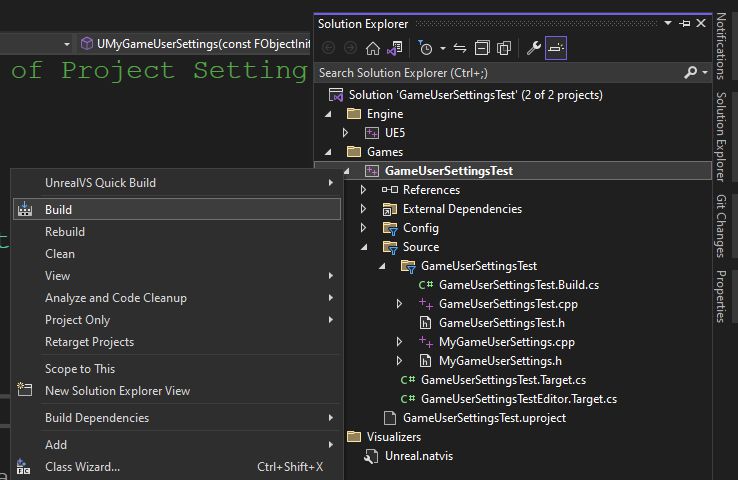
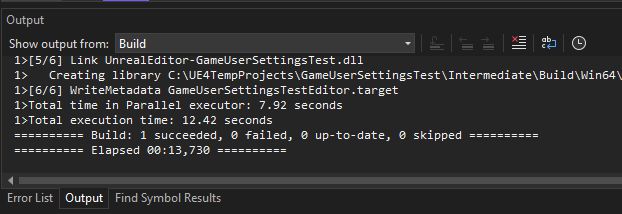
And now at the bottom output panel, we should see that our build has started, and it might take some time until it's done. If you did everything right, then you should see that the build succeeded.
If your build failed the first time, make sure that your Unreal Engine editor is closed. If the build still fails, scroll through the error messages; they might show you where you made a syntax error that you can correct.
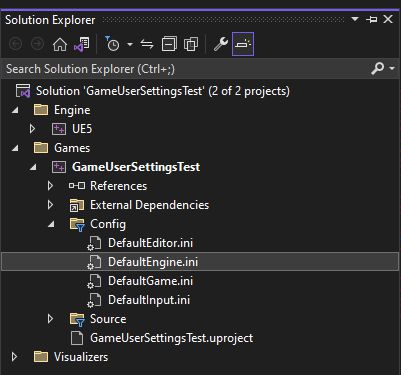
I opened it in Visual Studio, but you can open it in whatever text editor you like. Now in the file, scroll down to the /Script/Engine.Engine section, and under it, write GameUserSettingsClassName=/Script/YourProjectName.YourSettingsClassName
In my case it looked like this:
GameUserSettingsClassName=/Script/UserSettingsTest.MyGameUserSettings
Just make sure to remove the U prefix from the class name, and don't forget to save the changes to the file.
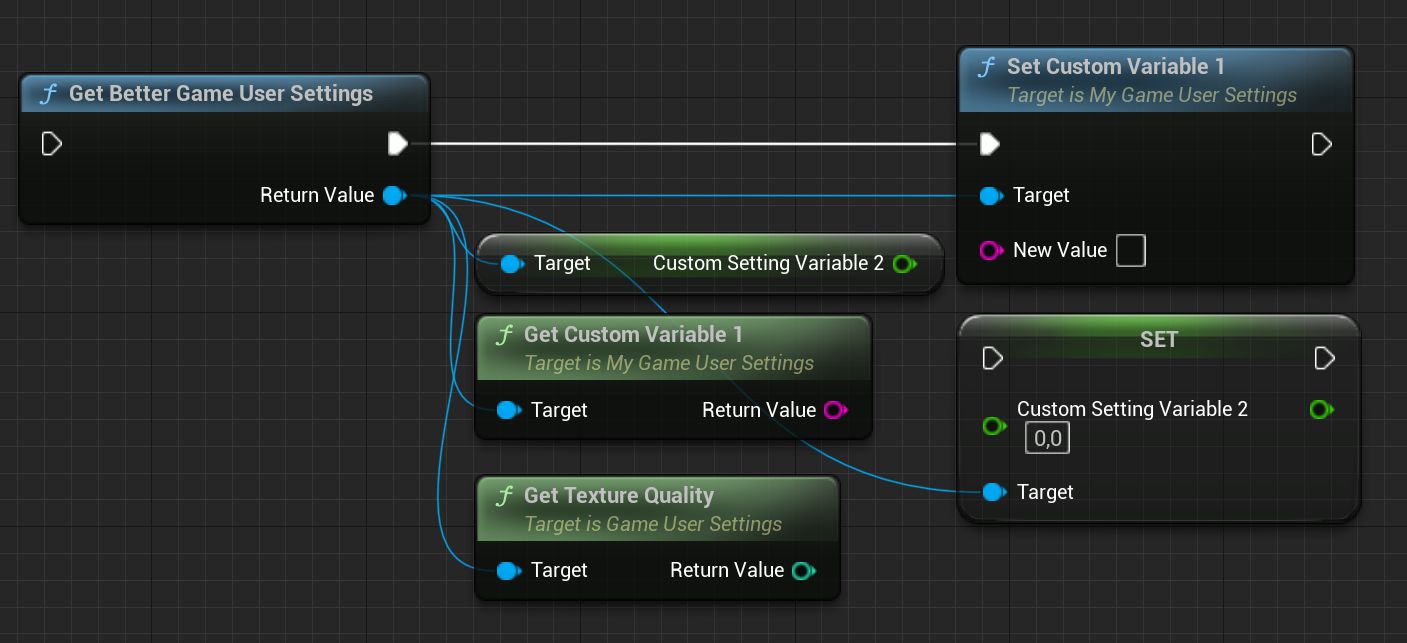
We can see that we can get and set both of our custom setting variables. We also have access to all previous user settings. Also, you can still use the Get Game User Settings node. So if you used that before in your project, you don't need to replace it with our new setting node.
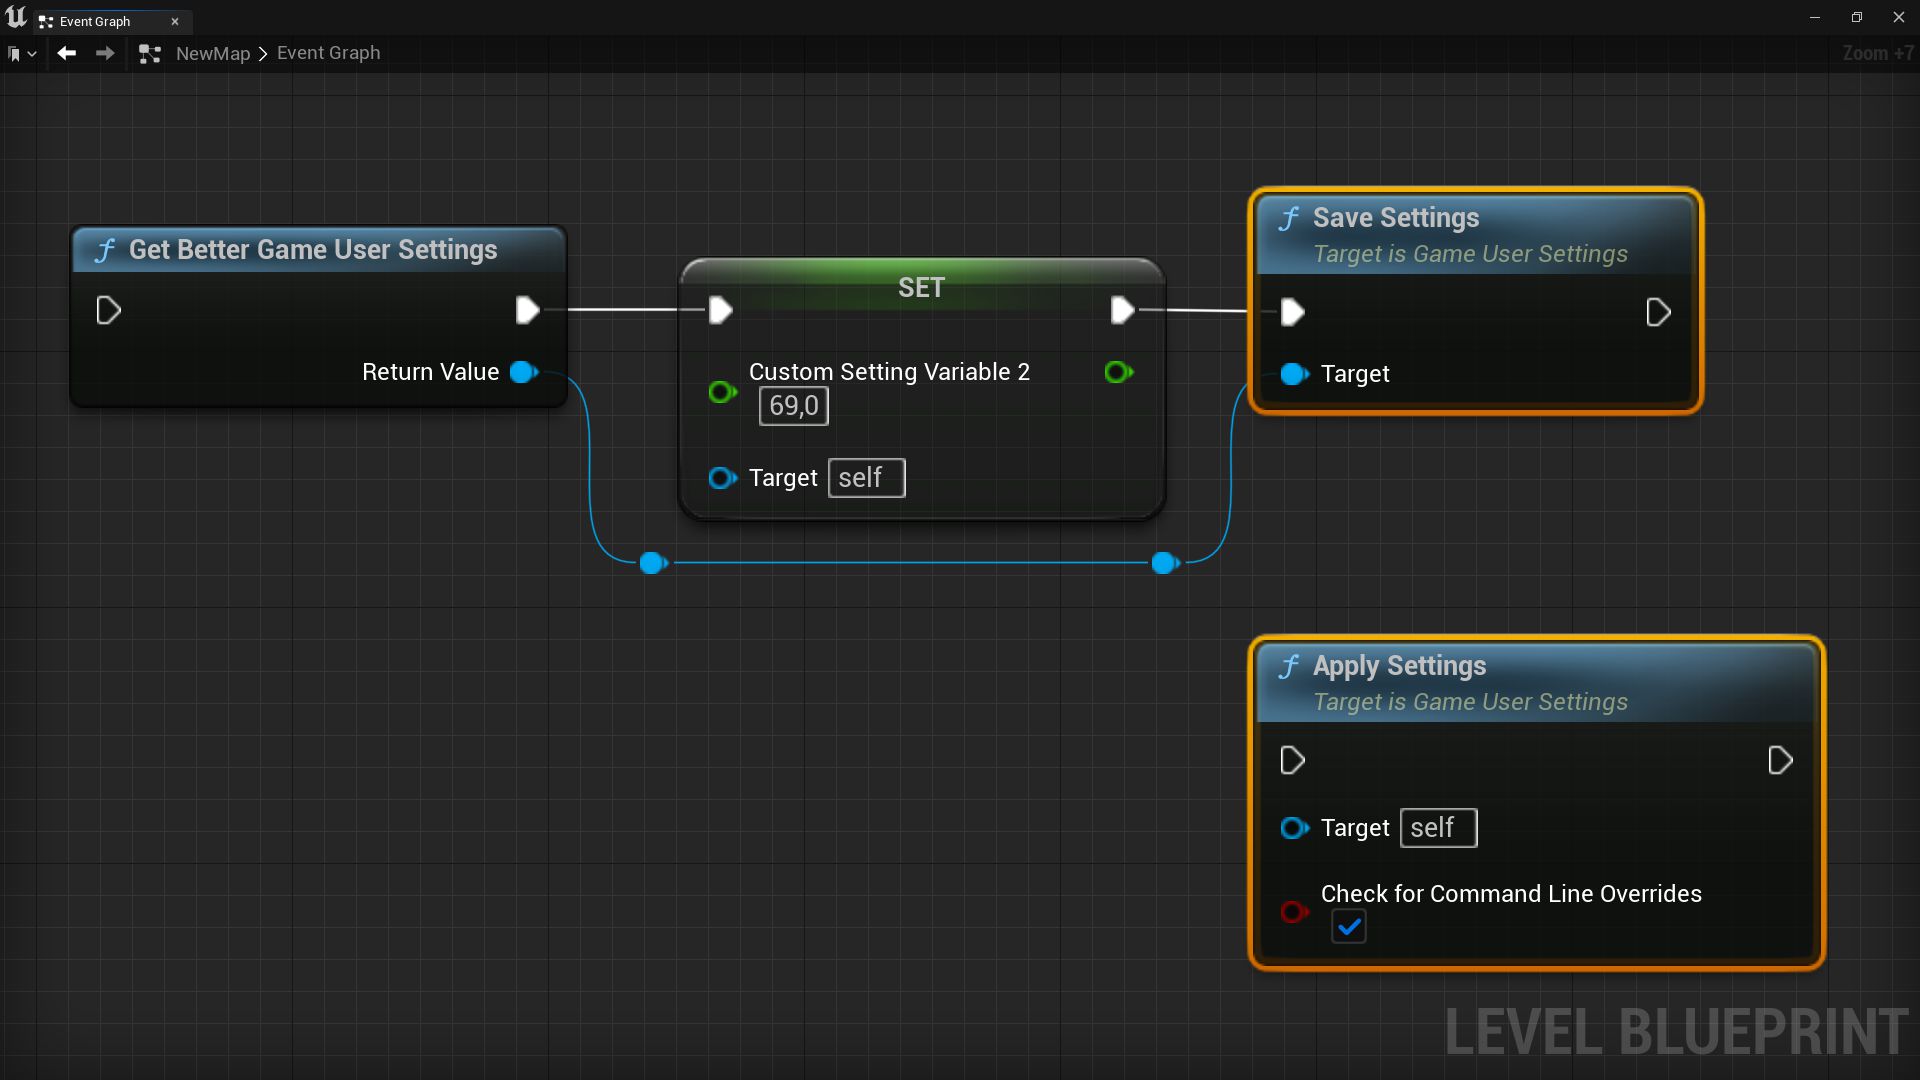
Also, remember to use the save or apply settings nodes to save setting values in config files.
#pragma once
#include "CoreMinimal.h"
#include "GameFramework/GameUserSettings.h"
#include "MyGameUserSettings.generated.h"
UCLASS()
class GAMEUSERSETTINGSTEST_API UMyGameUserSettings : public UGameUserSettings
{
GENERATED_UCLASS_BODY()
public:
UFUNCTION(BlueprintCallable)
void SetCustomVariable1(FString NewValue);
UFUNCTION(BlueprintPure)
FString GetCustomVariable1() const;
UFUNCTION(BlueprintCallable)
static UMyGameUserSettings* GetBetterGameUserSettings();
UPROPERTY(Config, BlueprintReadWrite)
float CustomSettingVariable2;
protected:
UPROPERTY(Config)
FString CustomSettingVariable1;
};CPP file
#include "MyGameUserSettings.h"

UMyGameUserSettings::UMyGameUserSettings(const FObjectInitializer& ObjectInitializer):Super(ObjectInitializer)
{
	CustomSettingVariable1 = TEXT("Default Value");
	CustomSettingVariable2 = 420.69f;
}

void UMyGameUserSettings::SetCustomVariable1(FString NewValue)
{
	CustomSettingVariable1 = NewValue;
}

FString UMyGameUserSettings::GetCustomVariable1() const
{
	return CustomSettingVariable1;
}

UMyGameUserSettings* UMyGameUserSettings::GetBetterGameUserSettings()
{
	return Cast<UMyGameUserSettings>(UGameUserSettings::GetGameUserSettings());
}
Also, don't forget to set your class as a default setting class in the config file.
Share on