How to bake normal maps in Blender 2.8 for UE4
by Arthur Ontuzhan
Posted 5 years ago Last edit 4 years, 4 months ago
Categories: Tutorials Blender Unreal Engine Tags: Blender 2.8 UE4
Table of contents
Introduction
Normal maps are a good way to get additional detail to the model without adding additional geometry to it. In this tutorial I will show how to bake normal maps in Blender 2.8 for UE4 and how to use them in UE4.
If you feel that you are pretty well familiar with a blender and UE4 and you don't want to read this whole thing, there is a really short version near the end of this article. Click here to get there faster.
Also, there is video at the end where I show the whole process.
Prerequisites
- Blender 2.8 or newer installed. (As I am creating this tutorial, I am using Blender 2.8 beta version, but it should not differ much in a stable release or newer versions.)
- I am using Unreal Engine 4.22, but older versions also should work.
- Basic knowledge of how to use Blender and UE4.
Normal map bake in Blender
Mesh creation
First we need to have 2 meshes.
- Low poly mesh - for which we will bake a normal map
- High poly mesh - more detailed mesh from which we will bake details to the normal map
For simplicity, we will use planes as our meshes.
So we will start with a new empty blender project. By default blender new projects will not be empty, so we will clean it empty.
- I prefer to do that by once pressing A key, then pressing X and then accepting deletion by hitting Enter or by a mouse click.
- Or just do that your way.
After then we will add the plane to our scene.
- To add plane - press Shift + A and then in Mesh sub-menu select Plane
You should see just a plane in your scene now. Because we will have 2 planes, let's rename it to some meaningful name. I will rename it to LowPoly.
- To rename - in the right upper corner in an Outliner double click on the Plane and change its name to LowPoly
After that, we will duplicate our existing plane and rename it as HighPoly
- To duplicate - select existing plane and press Shift + D and complete with a right mouse click or Enter
Now we need to add details to our HighPoly mesh, so we could bake details in our normal map.
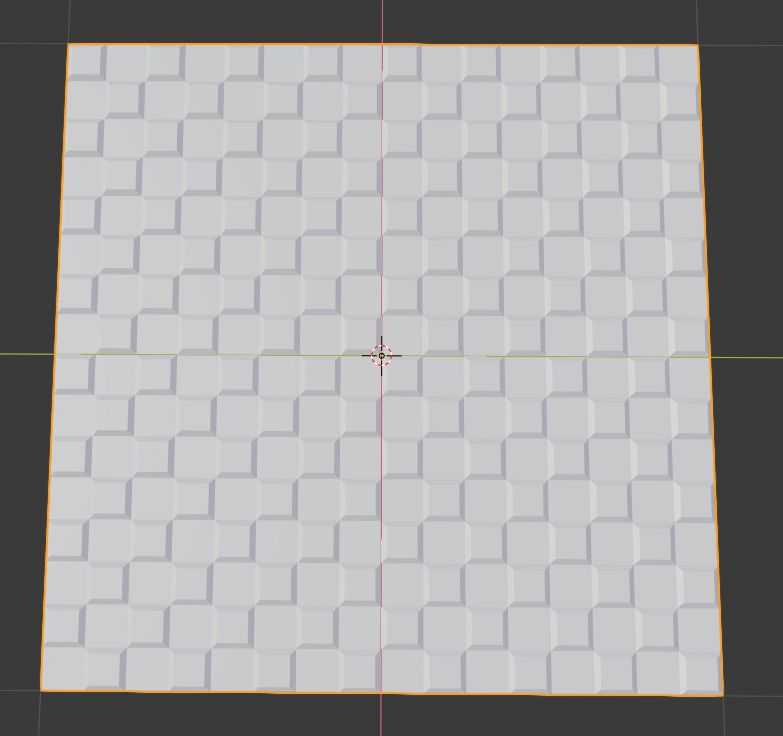
You can see that I made checker like pattern on my HighPoly mesh.
When you add your details, remember that we can't bake in normal map bumps or any grooves which do not have any slopes on sides. For example, if you will extrude just a face straight up, and its sides will be perpendicular to the base, it will not be shown in the normal map. Also, remember that normal maps are not changing geometry to the mesh, normal maps just change how the light gets reflected from the object and makes an illusion that it has more geometry.
If you want to have same details on your HighPoly mesh as I have, you can follow these steps:
- It's optional, but I hide LowPoly mesh so it would not bother me while I work with the other mesh - select LowPoly mesh and press H or in the Outliner click on the eye icon next to it.
- Open HighPoly mesh in edit mode - select mesh and then press Tab
- Subdivide mesh 4 times - right mouse click on it and then in menu select subdivide, in total do this 4 times
- Select faces in a checker pattern - press 3 to have face select enabled then press F3 and search for Checker Deselect and select it
- Insect faces - press I and slowly move mouse to choose how far insect faces, then accept with a left mouse click or Enter
- Move faces up- press G then Z and with a mouse move faces little up and then accept with a left mouse click or Enter
- Exit edit mode - press Tab
To make material:
- At the top of blender window select Shading tab
- In the Outliner select LowPoly mesh
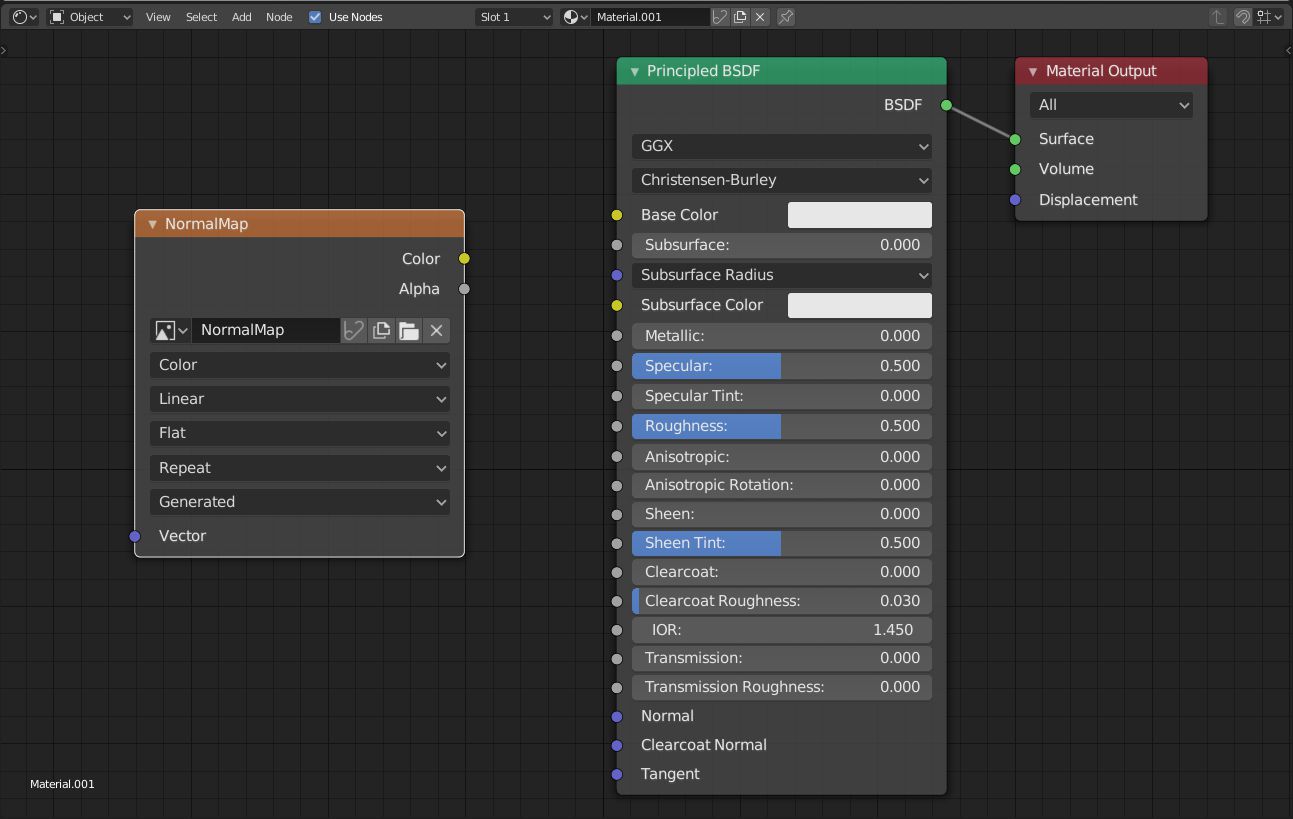
- In the middle, below the 3D Viewport, at the top middle of the Shader Editor click one New button
- Move mouse in the Shader Editor and press Shift + A, select Search and find Image Texture and select it and place it by left mouse click or Enter
- In the Image Texture node click on New and name your map and choose a resolution for it and accept with Ok. I named my map as NormalMap and left resolution as it was 1024x1024px
Normal map baking
Now our meshes are ready to bake normal map.
To bake normal map:
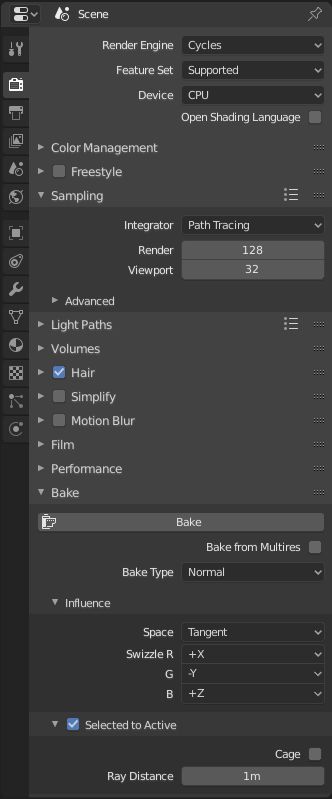
- In the left side of blender window in the Properties open Render tab.
- Change render engine to Cycles
- In a Bake section change Bake Type to Normal
- Because UE4 Y-axis are flipped compare to blender Y-axis, we need to under Influence section change G value to -Y
- Check Selected to Active and under that section make Ray Distance bigger than your bumps and grooves on HighPoly mesh, I set it to 1m
- In an Outliner select HighPoly mesh and then holding Shift select LowPoly mesh
- Press Bake button in Properties
At the right side of the blender window in the Image Editor you should see your baked normal map.
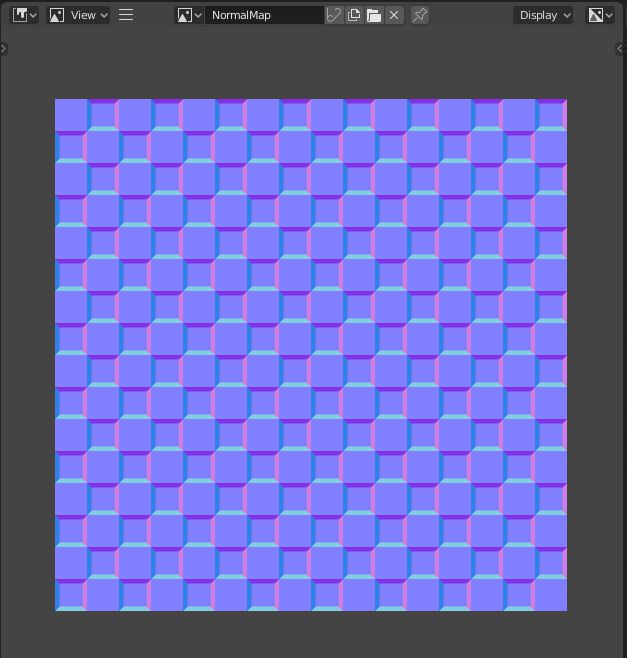
To use it, we need to save it:
- In Image Editor click on ≡ button
- In the menu select Image and then Save As...
- Choose a name for image and location where to save it and click Save As Image
Mesh export
We will also export both meshes, so we could compare how normal map gained details compare to actual mesh geometry details.
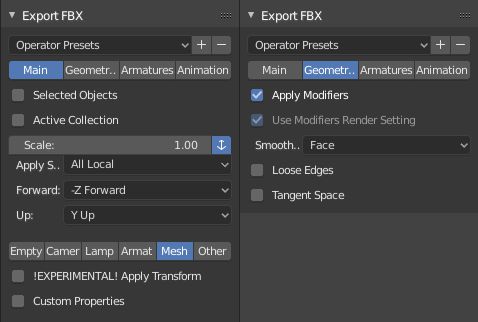
To export static meshes from blender for UE4:
- Click on File->Export->FBX (.fbx)
- Make sure that in a Main setting tab Mesh is selected as exportable object
- In a Geometries tab set Smoothing to Face
- Choose a place and name for your file and press Export FBX
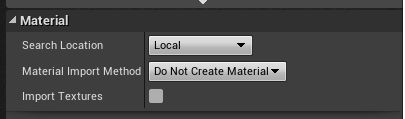
To import assets:
- Push on Import button
- Select our previously exported FBX file and normal map
- Make sure that when you are importing FBX, that in Material section Material Import Method is set to Do Not Create Material because we will create materials by ourselves
- Press the import button at the import window bottom
Material creation
Now when we have our assets imported, we need to create two materials. One material will use a normal map and the other one will be basic material for HighPoly mesh.
To create a new material:
- Click Add New button or right mouse click in the content browser
- Select Material
- Name your newly created material
- We will do these steps above 2 times and name one material M_HighPoly and the other one M_LowPoly
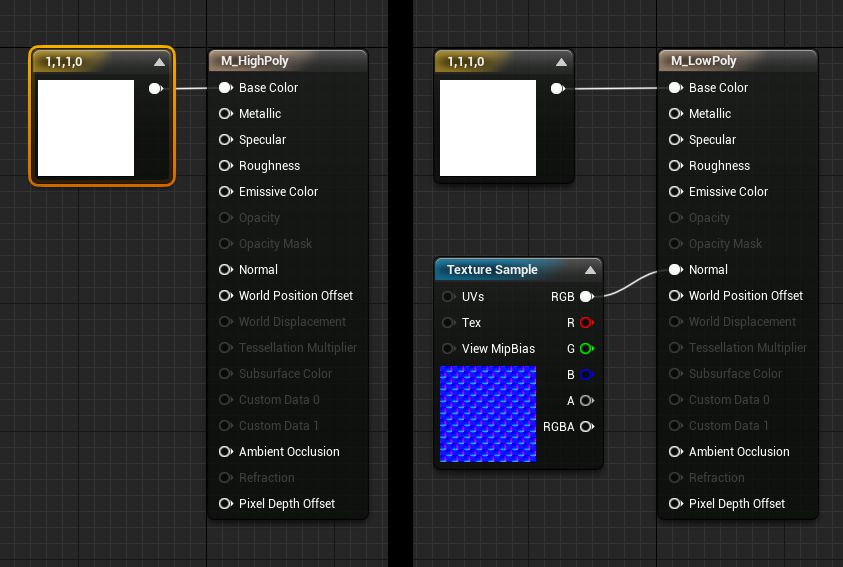
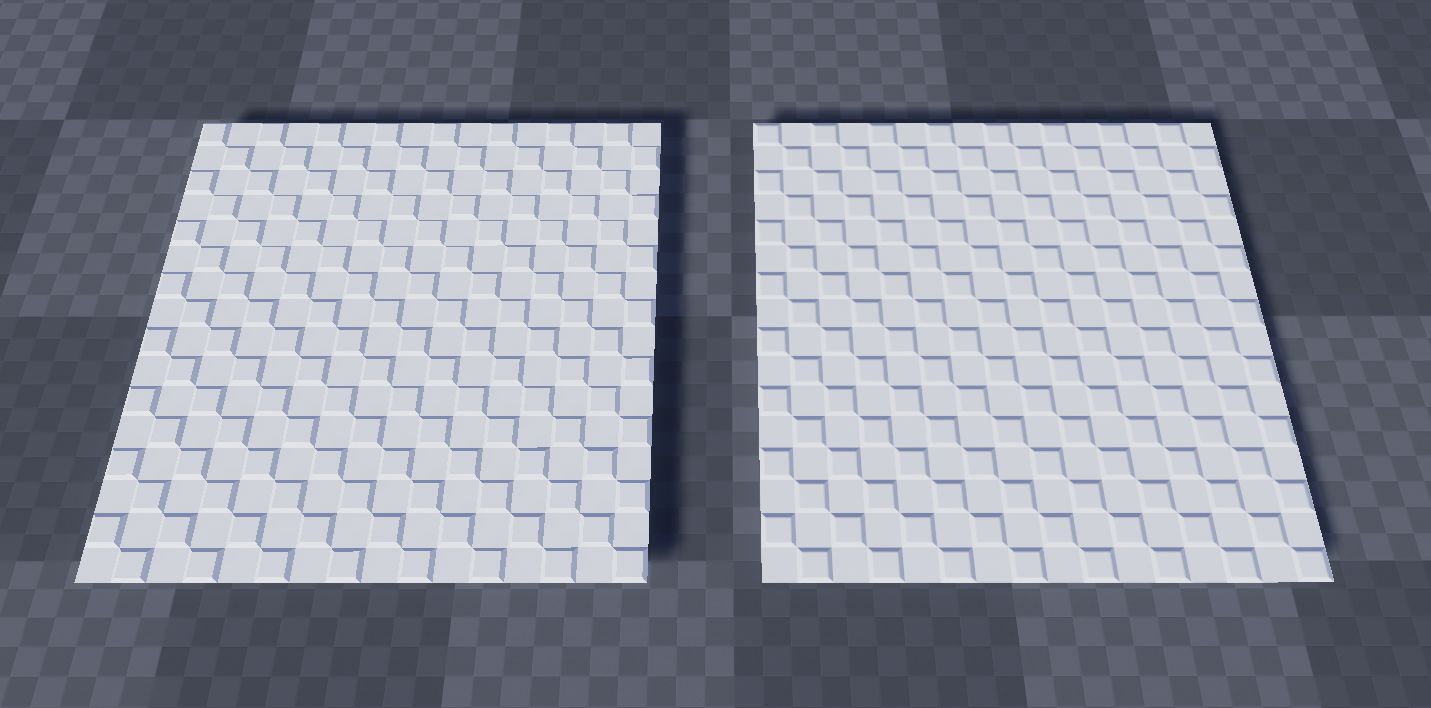
In an image above you can see how we need to set each materials. On the left side we can see M_HighPoly material and on the right side - M_LowPoly.
Open each material and set them as in the image above:
- To easily create Constant4Vector node - hold down 4 and do left mouse click in the material editor. In these nodes I set my colors to white.
- To easily create TextureSample node - hold down T and do left mouse click in the material editor. In this node we set our normal map as texture.
After we have made our materials we can use them with our meshes.
From the content browser we will pull both of our imported meshes in our game level and place them as we like. Then simply pull over a HighPoly mesh M_HighPoly material, and on LowPoly mesh - M_LowPoly mesh.
At the image above you can see what result I got. On the left side is HighPoly mesh and on the right side - LowPoly mesh with the normal map applied on it. Now you can move around those meshes and experience how normal maps work.
Short version
I made this short summary for those who don't want to read so much and feel pretty familiar with a blender and UE4.
- Have 2 meshes:
- LowPoly - base meshes for which you want to bake normal map
- HighPoly - mesh which is based on previous mesh but it contains details which you want to get baked in normal map
- Add LowPoly mesh material which contains Image Texture node, where we will bake our normal map
- Set baking settings:
- Change render engine to Cycles
- In a Bake section change Bake Type to Normal
- Because UE4 Y-axis are flipped compare to blender Y-axis, we need to under Influence section change G value to -Y
- Check Selected to Active and under that section make Ray Distance bigger than your bumps and grooves on HighPoly mesh, I set it to 1m
- Make sure that your meshes overlap each other as needed and press Bake button
- Save normal map
- Use normal map in UE4 material by connecting it to Normal input.
Share on
Related Creations
Related Articles
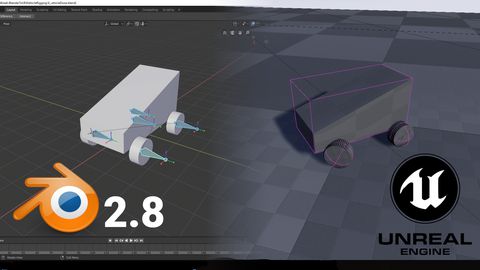
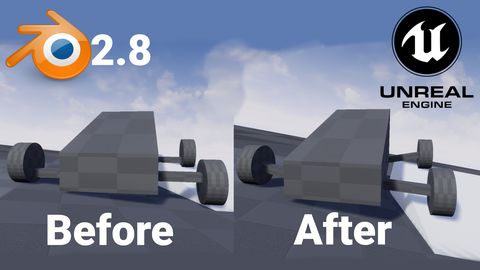
How to get simple suspension animation for vehicle in UE4 with Blender 2.8
Tutorials Blender Unreal Engine